Installing WordPress has never been easier. Our cPanel hosting accounts come equipped with WP Toolkit, a powerful management interface that simplifies the entire process of setting up new WordPress websites.
This guide will walk you through the steps to quickly install WordPress on your domain using WP Toolkit, right from your cPanel.
Step 1: Log into cPanel
You can access cPanel in two ways:
1. Through the HostMidas Client Area:
• Log into the HostMidas client area.
• Under Active Products, find your hosting plan and click Login to Control Panel.

2. Manual Login:
Alternatively, you can access cPanel directly by visiting:
https://yourdomain.nz/cpanel
Use your cPanel username and password to log in.
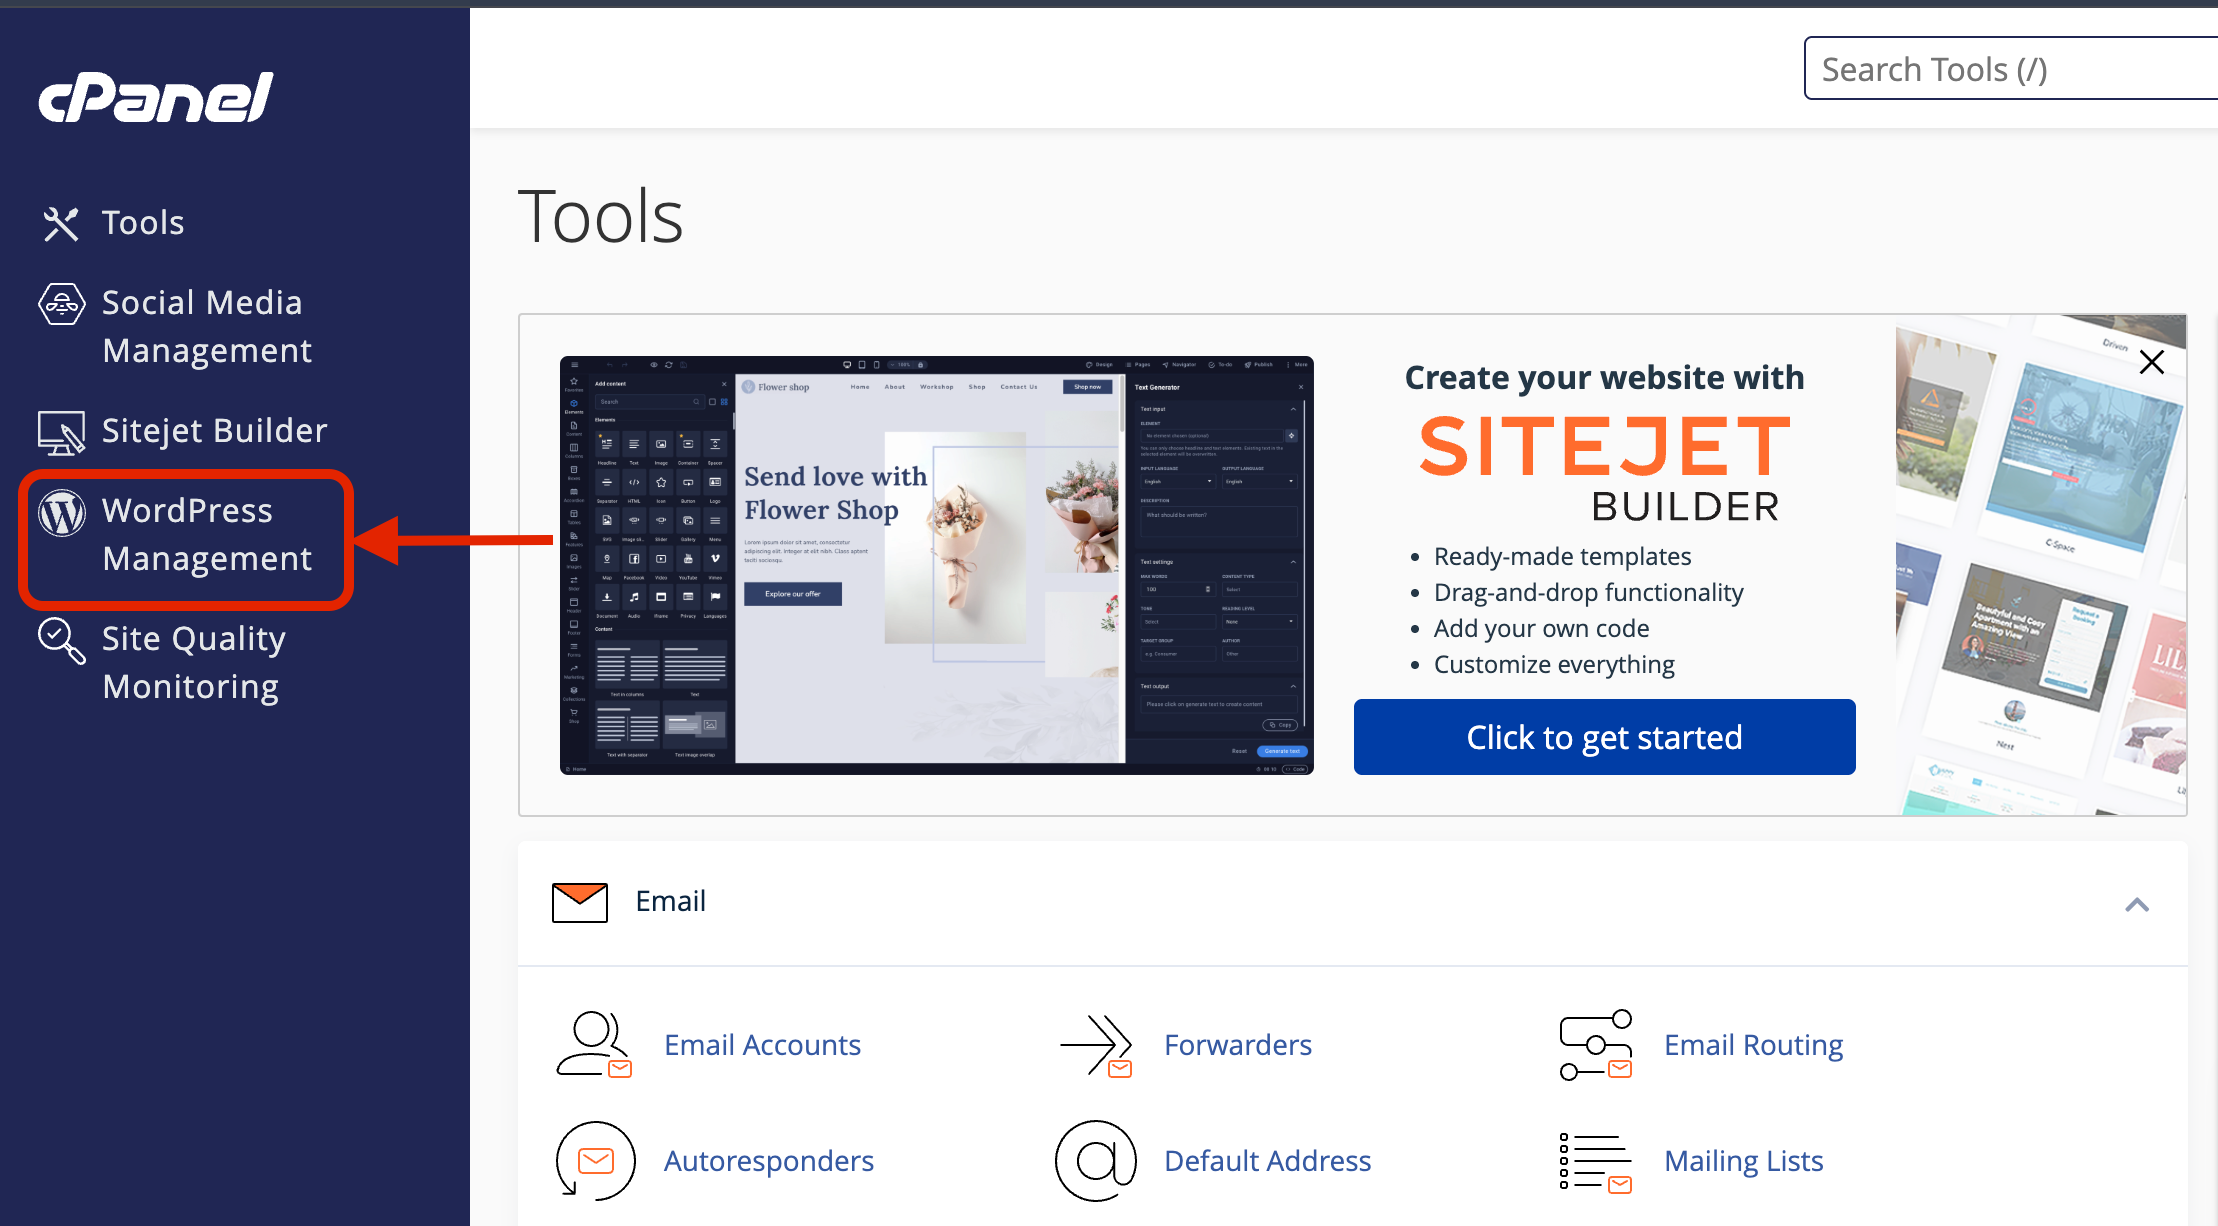
Step 2: Access WordPress Management
Once in cPanel, scroll down to the WordPress Management section.

Step 3: Initiate the WordPress Installation
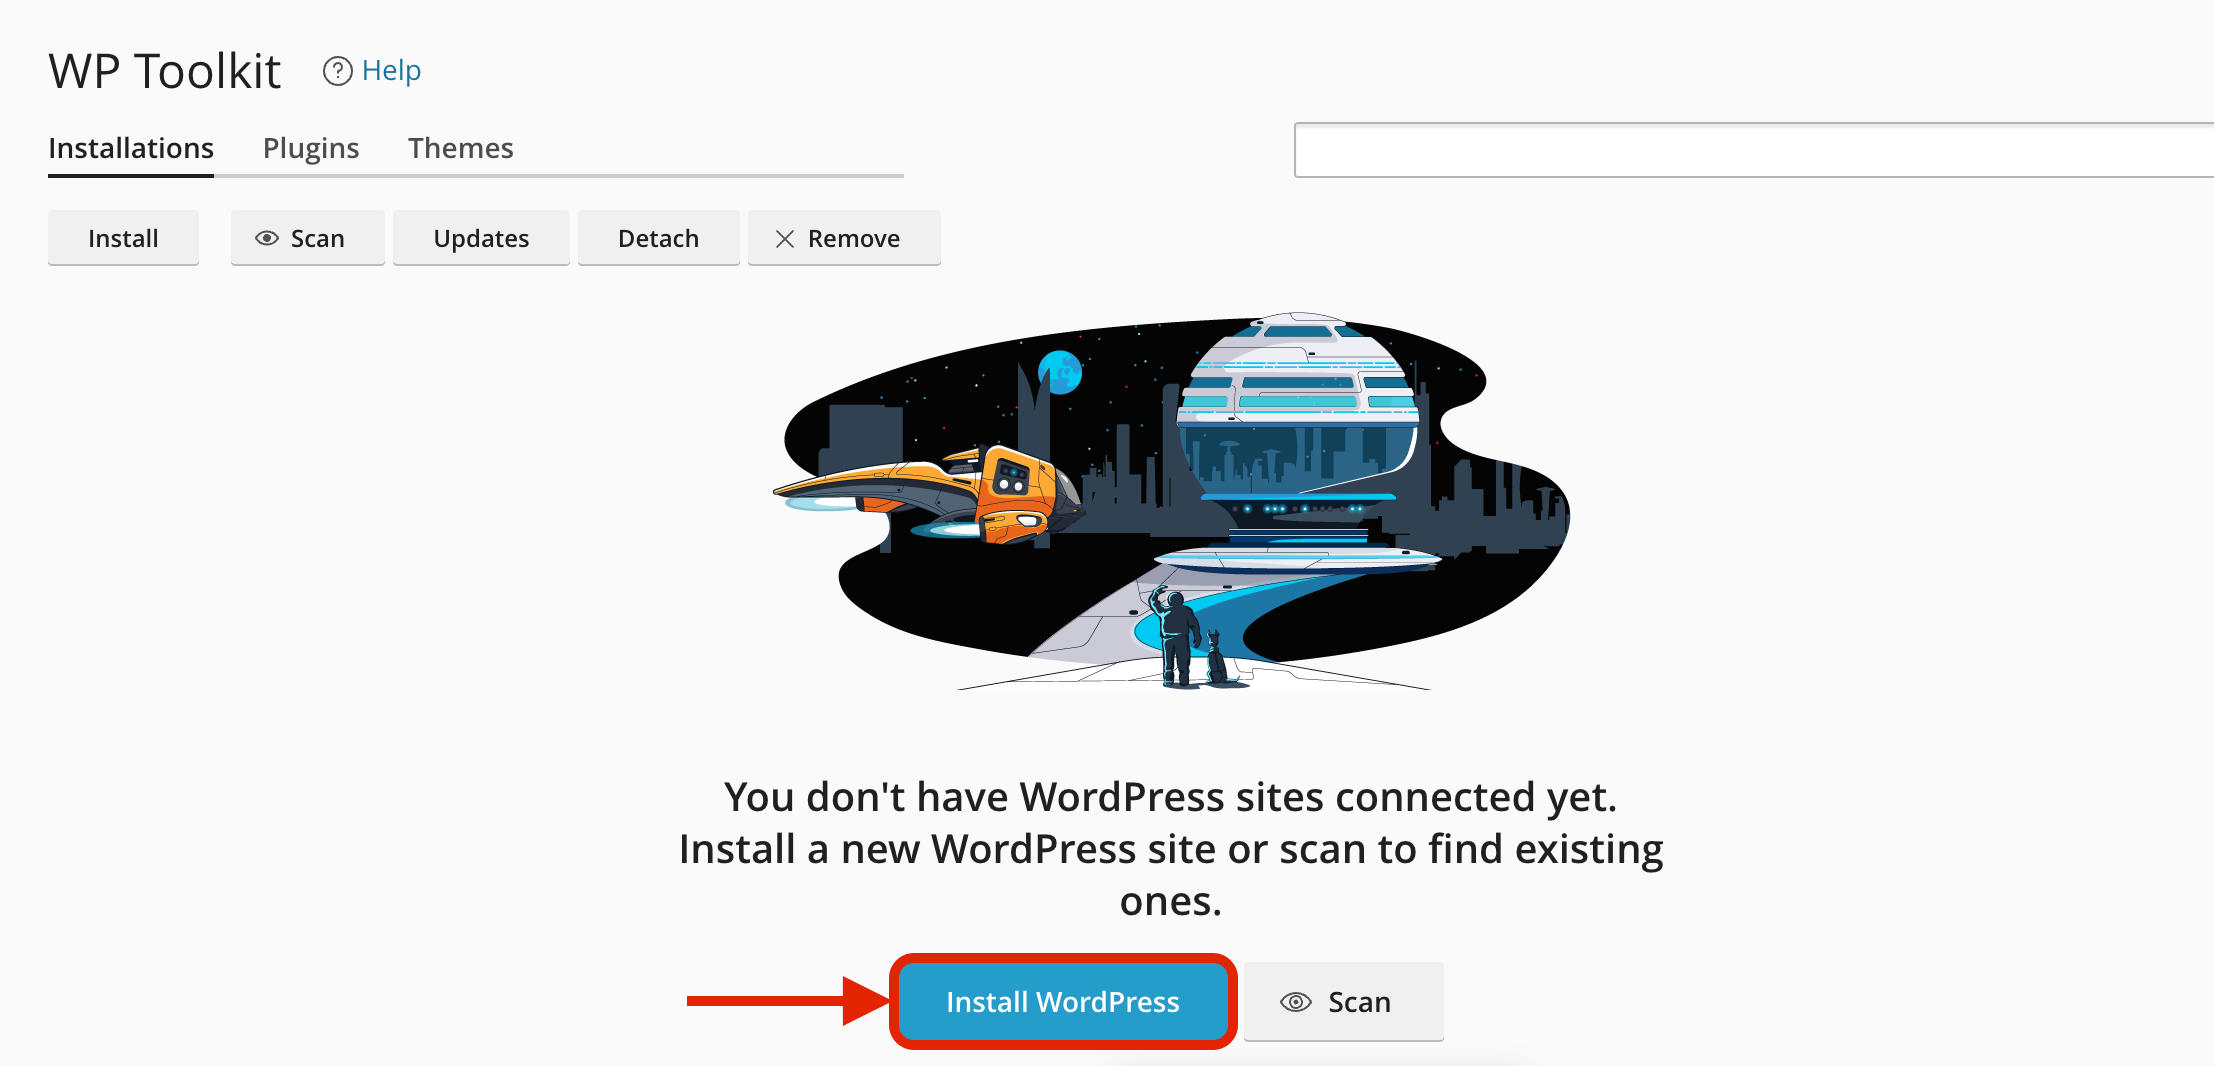
If this is your first WordPress site using WP Toolkit, you’ll see a screen indicating no installations are connected yet.
-
Click the prominent “Install WordPress” button to begin.

Step 4: Configure Your WordPress Installation Options
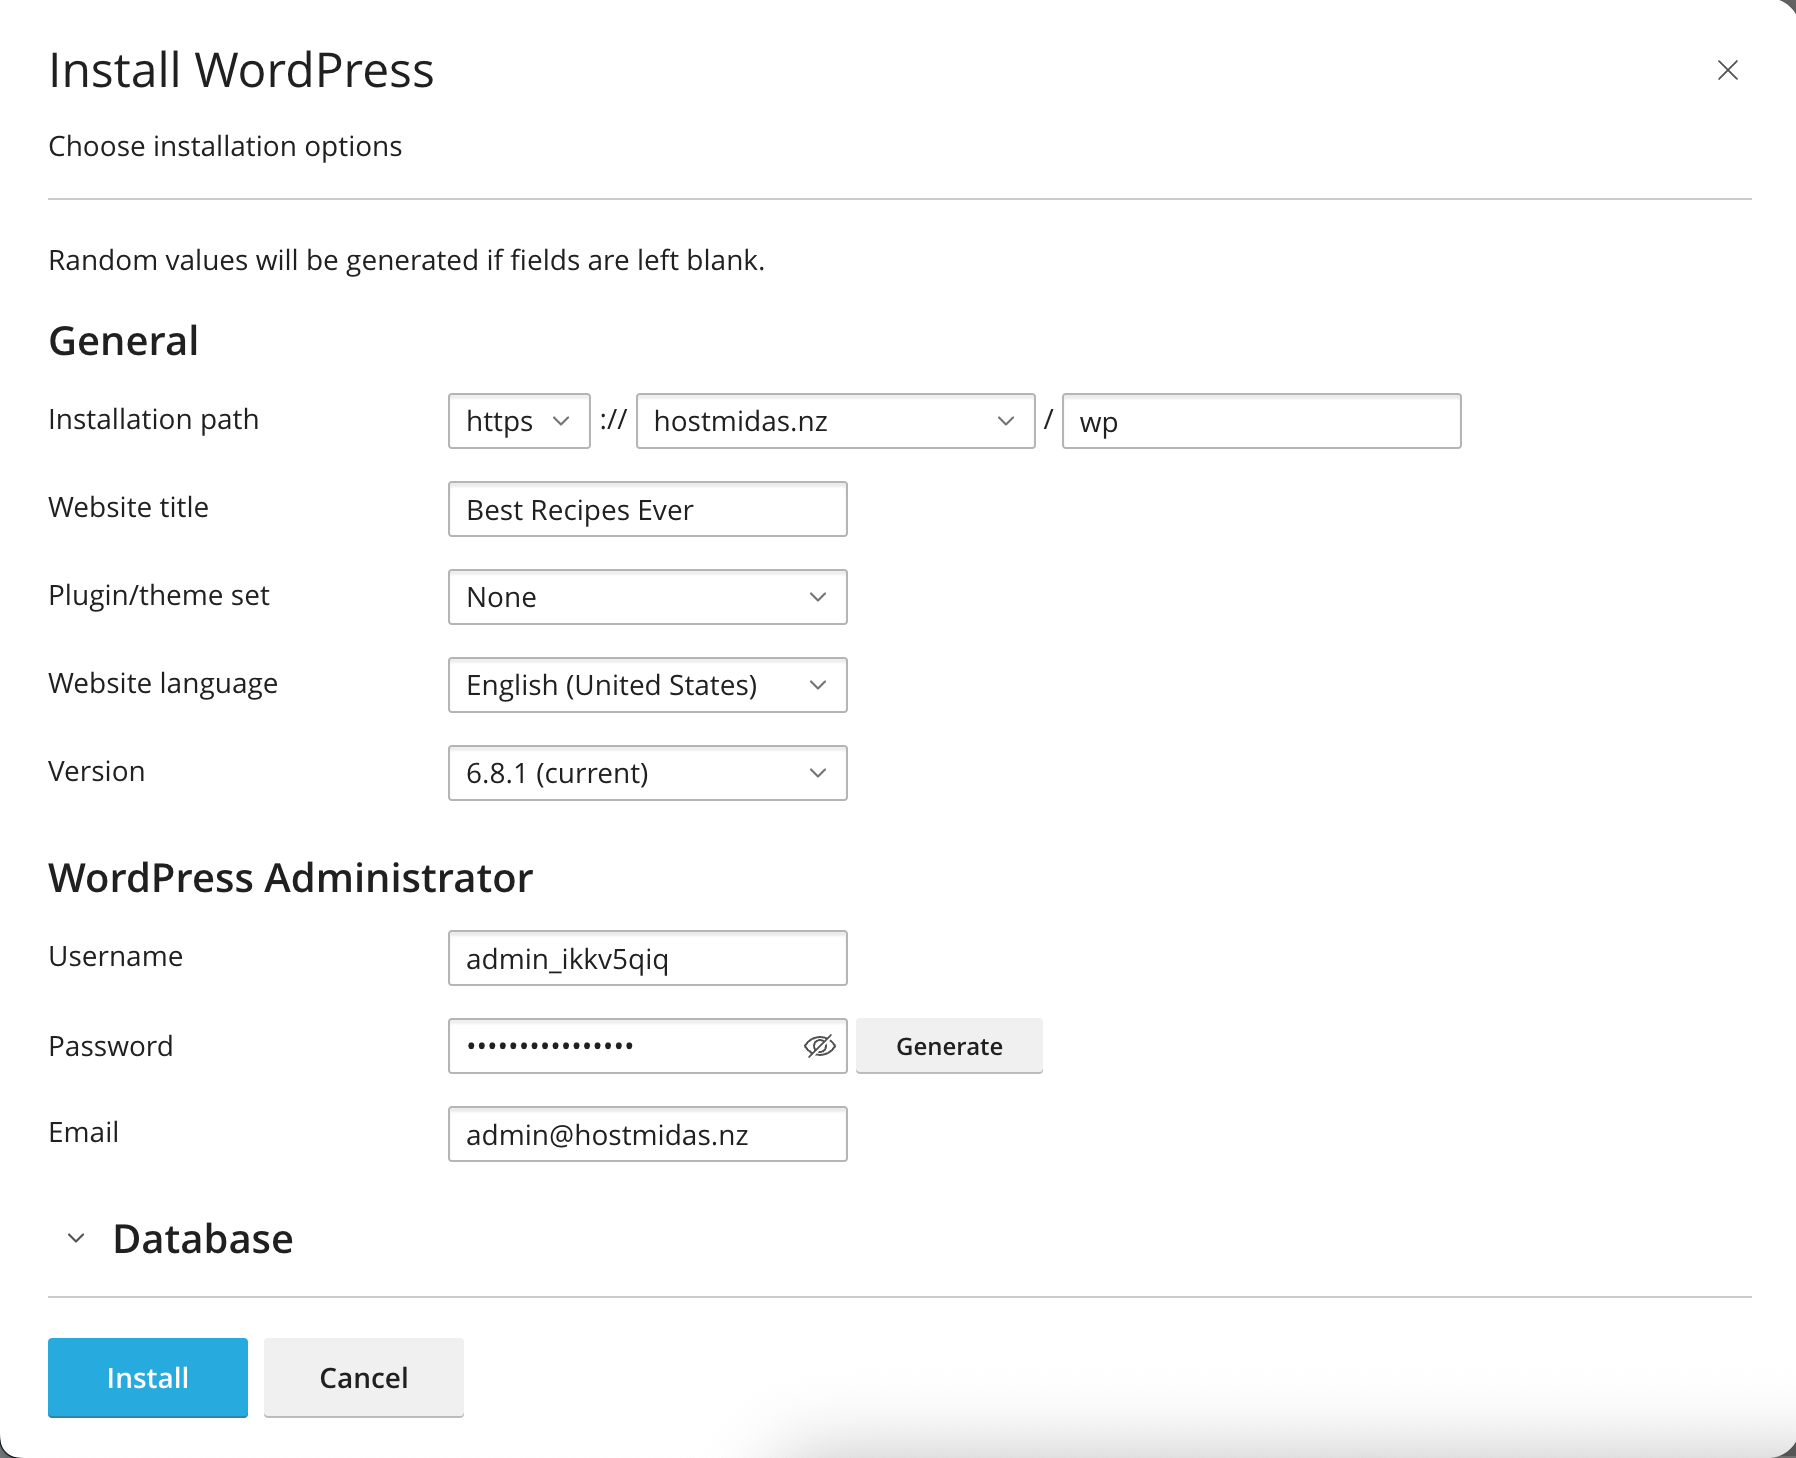
You will now see the “Install WordPress” configuration form. This is where you’ll define your site’s settings.
-
Installation Path:
-
Crucial Note: If you want WordPress installed directly in your site’s root directory (e.g.,
yourdomain.nz), leave the directory field blank. -
If you wish to install WordPress in a subdirectory (e.g.,
yourdomain.nz/blog), enterblog(or your desired directory name) into the directory field. -
Choose your domain from the dropdown menu (e.g.,
hostmidas.nz).
-
-
Website Title: Enter the desired title for your website (e.g., “Best Recipes Ever”). You can change this later from within WordPress.
-
Plugin/theme set: For a clean install, select “None”. You can install plugins and themes later.
-
Website language: Select your preferred language for the WordPress dashboard.
-
Version: It’s generally recommended to stick with the (current) version unless you have a specific reason not to.
-
WordPress Administrator:
-
Username: Enter your desired admin username. For security, avoid common usernames like “admin.”
-
Password: Use the “Generate” button to create a strong, secure password, or enter your own complex password. Make sure to save this securely!
-
Email: Enter the email address that will be associated with the admin user. This is important for password resets and notifications.
-
-
Database: You can typically leave these settings as they are; WP Toolkit will generate the necessary database details automatically.
Once all fields are configured to your liking:
-
Click the blue “Install” button at the bottom.

WP Toolkit will now proceed with the installation. This may take a few moments.
Need Help?
If you encounter any issues while setting up WordPress or need further assistance, feel free to contact HostMidas Support. We’re here to help!
Want to see what our customers are saying? Check out our Trustpilot reviews to learn why businesses choose HostMidas for reliable hosting services.
