Welcome to the exciting world of WordPress! If you’ve chosen HostMidas.nz for your web hosting in New Zealand or Australia, you’re in the right place for an easy website setup. This guide will walk you through how to install WordPress using Softaculous in cPanel. Let’s get started!
Step 1: Logging into cPanel and Finding Softaculous
You can access cPanel in two ways:
1. Through the HostMidas Client Area:
• Log into the HostMidas client area.
• Under Active Products, find your hosting plan and click Login to Control Panel.

2. Manual Login:
Alternatively, you can access cPanel directly by visiting:
https://yourdomain.nz/cpanel
Use your cPanel username and password to log in.
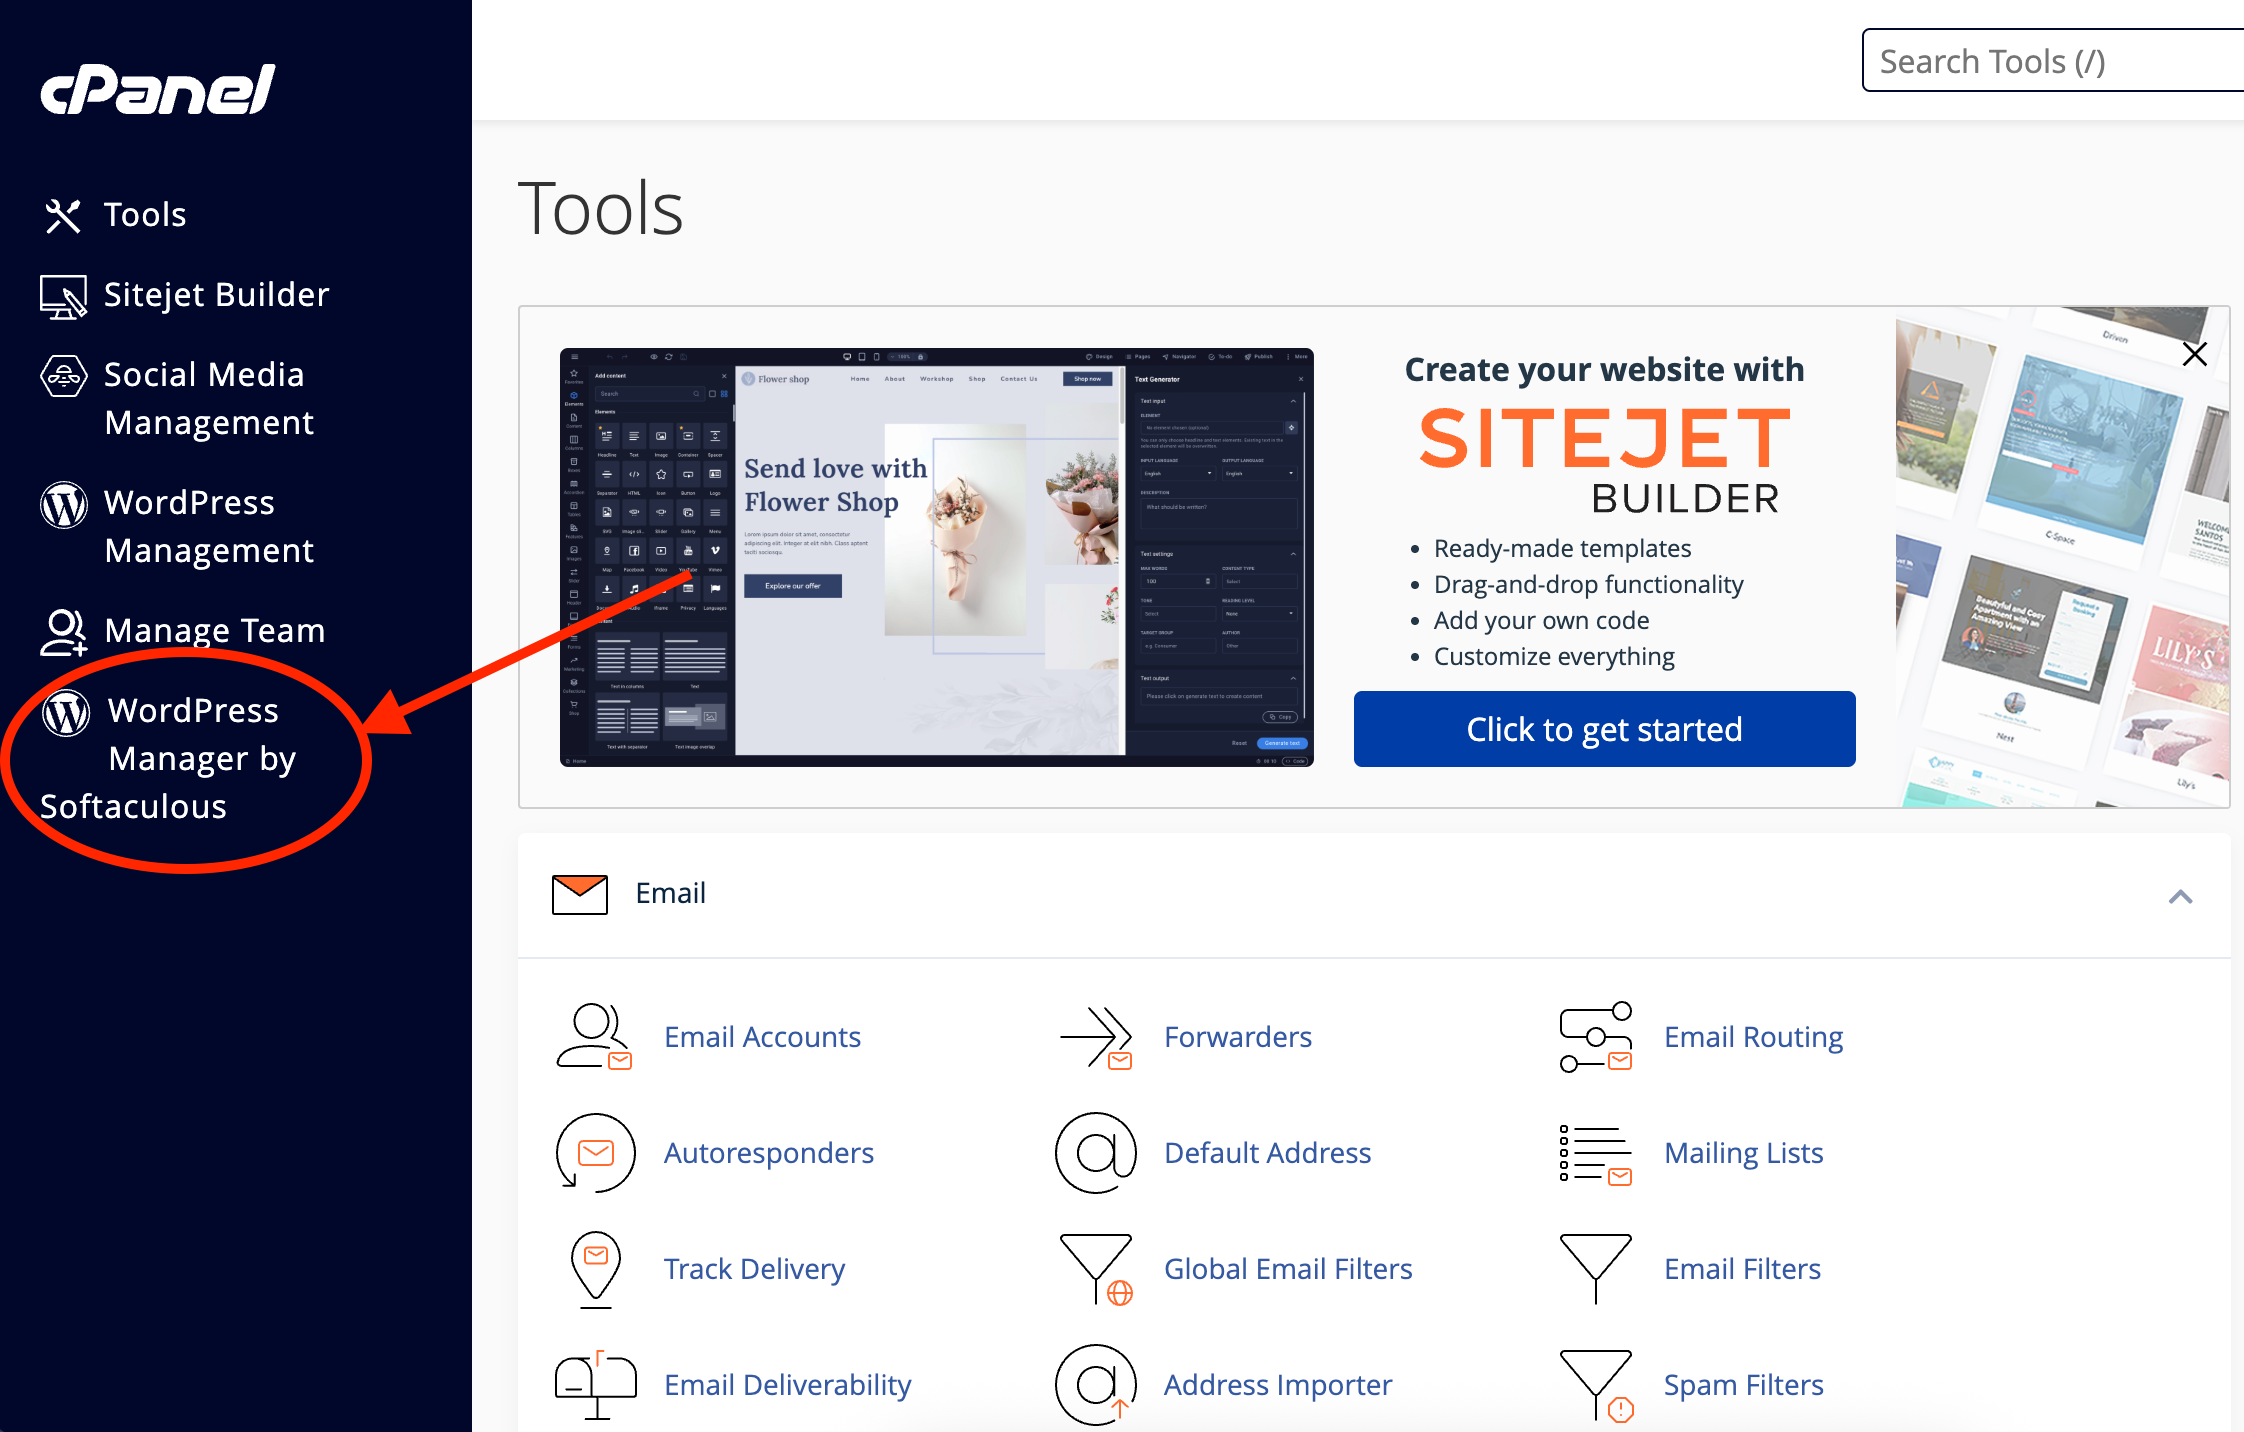
Once you’re logged into your cPanel, you’ll see a dashboard with various tools and settings to manage your hosting account. To begin the WordPress installation, look for the “Tools” section. Within this section, you should find a tool called “WordPress Manager by Softaculous”. This is a popular and user-friendly tool that simplifies the WordPress installation process. Click on this link to proceed to the next step.
Step 2: Initiating the WordPress Installation in Softaculous
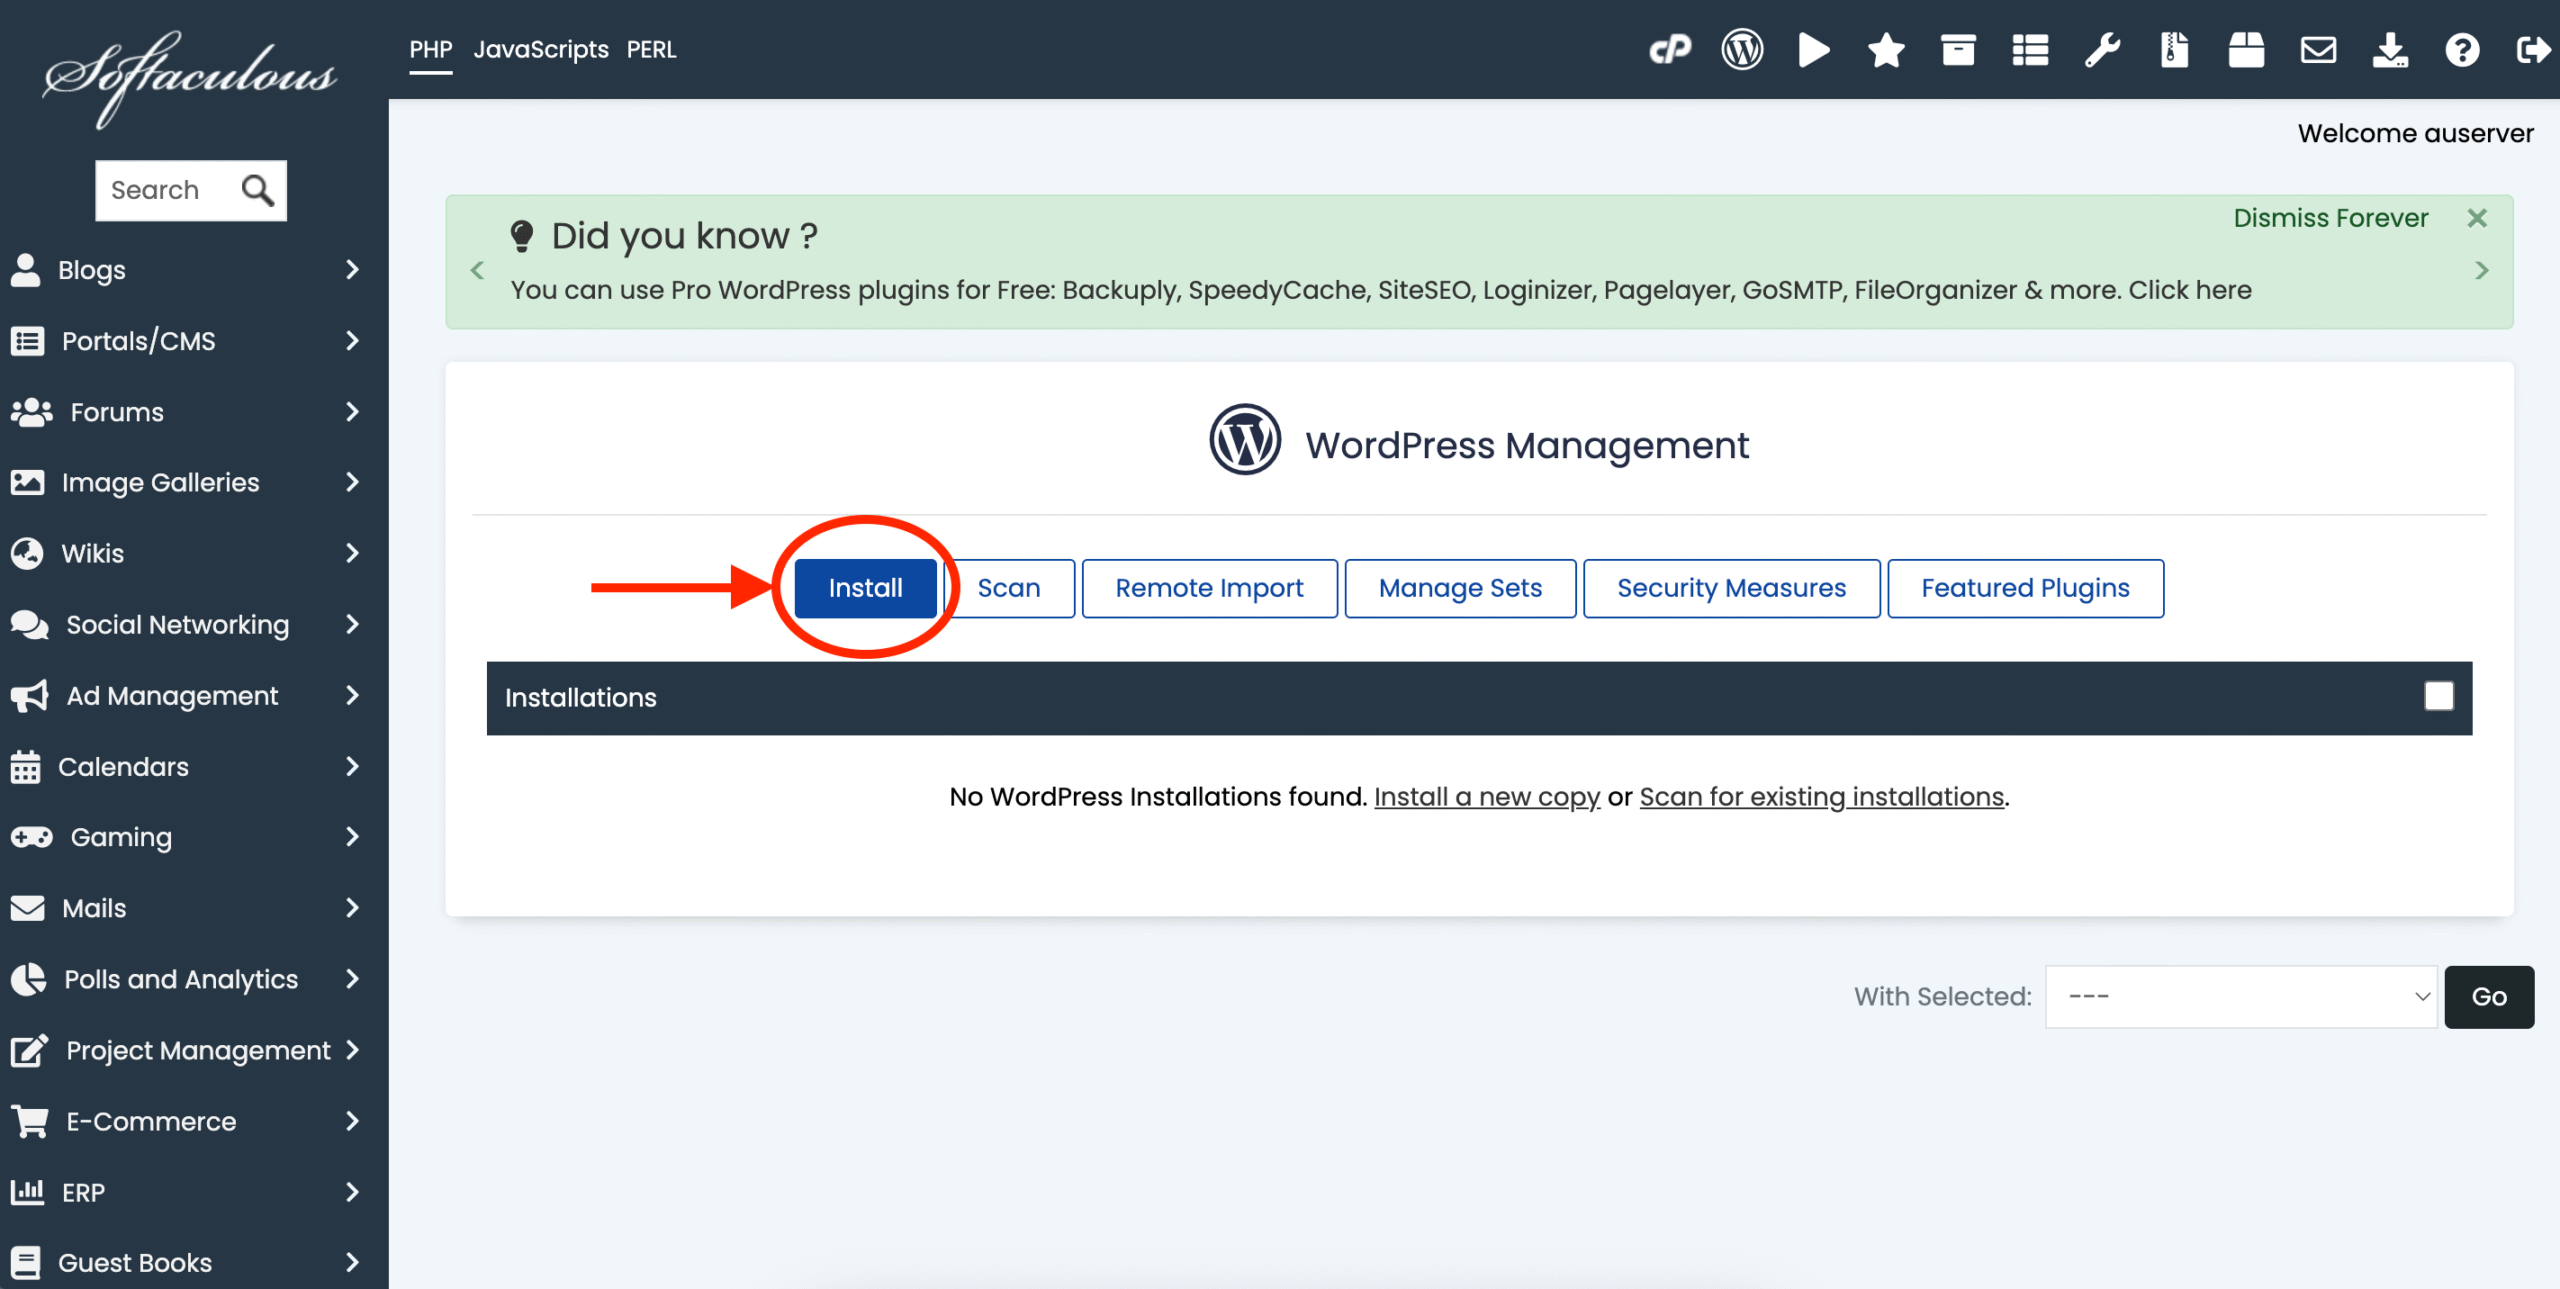
After accessing the “WordPress Manager by Softaculous” in cPanel, you will be taken to the WordPress Management interface. On this page, you will see an “Install” button prominently displayed. Click this button to begin the WordPress installation process.
Step 3: Configuring Your WordPress Installation in Softaculous
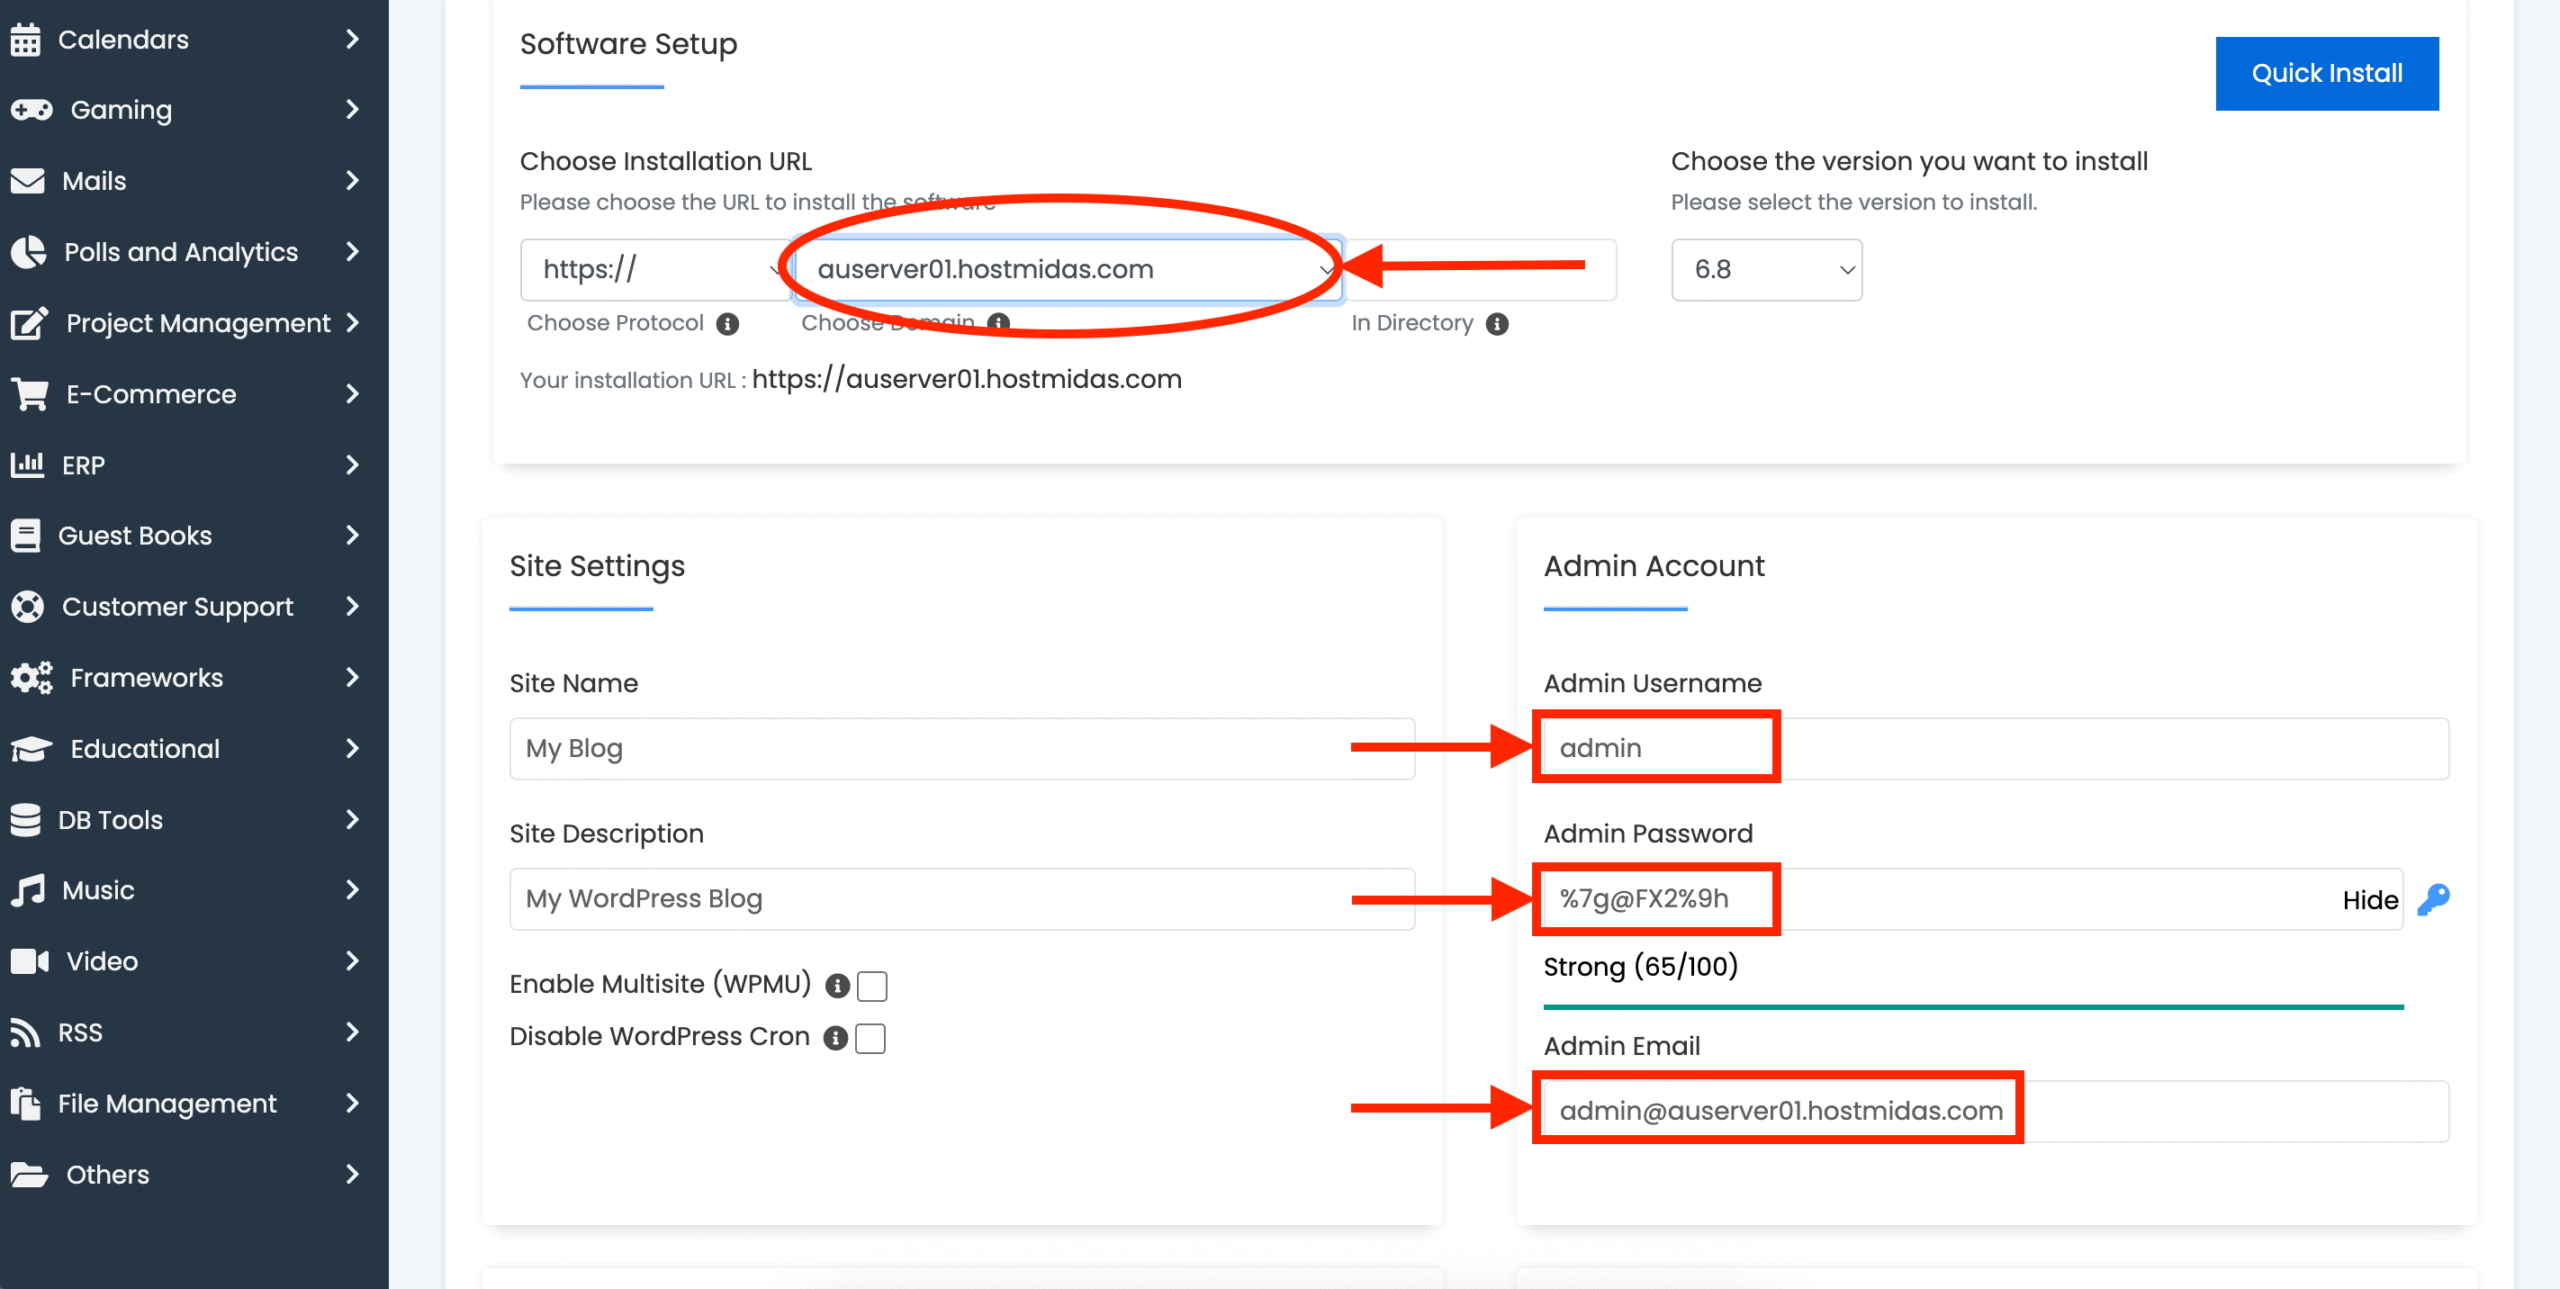
After clicking “Install” in the WordPress Manager by Softaculous, you’ll be taken to the Software Setup page. This is where you configure the core settings for your WordPress installation.
You’ll need to provide the following information:
- Choose Installation URL:
- Choose Protocol: Select the protocol (usually
https://for secure sites). - Choose Domain: Select the domain where you want to install WordPress (e.g.,
yourdomain.nz). - In Directory: Leave this blank to install WordPress in the root directory (so your website will be accessible at
yourdomain.nz). If you want to install it in a subdirectory (e.g.,yourdomain.nz/blog), enter the subdirectory name here.
- Choose Protocol: Select the protocol (usually
- Site Settings:
- Site Name: Enter the name of your WordPress website (e.g., “My Business Website”).
- Site Description: Provide a brief description of your website (e.g., “The official website for my NZ business.”).
- Enable Multisite (WPMU): Leave this unchecked unless you plan to create a network of multiple WordPress sites.
- Disable WordPress Cron: Generally, you should not disable WordPress Cron.
- Admin Account:
- Admin Username: Choose a username for your WordPress administrator account. Important: Do not use “admin” as your username for security reasons. Choose something unique and difficult to guess.
- Admin Password: Create a strong password for your administrator account. Softaculous usually provides a password strength indicator to help you. Use a combination of uppercase and lowercase letters, numbers, and symbols. Click the “eye” icon to reveal the password.
- Admin Email: Enter the email address associated with your administrator account. This is where WordPress will send notifications.
Step 4: Completing the Installation
Note that you should save the WordPress username and password you’ve chosen, as you’ll need them in the future to log into your WordPress admin area.
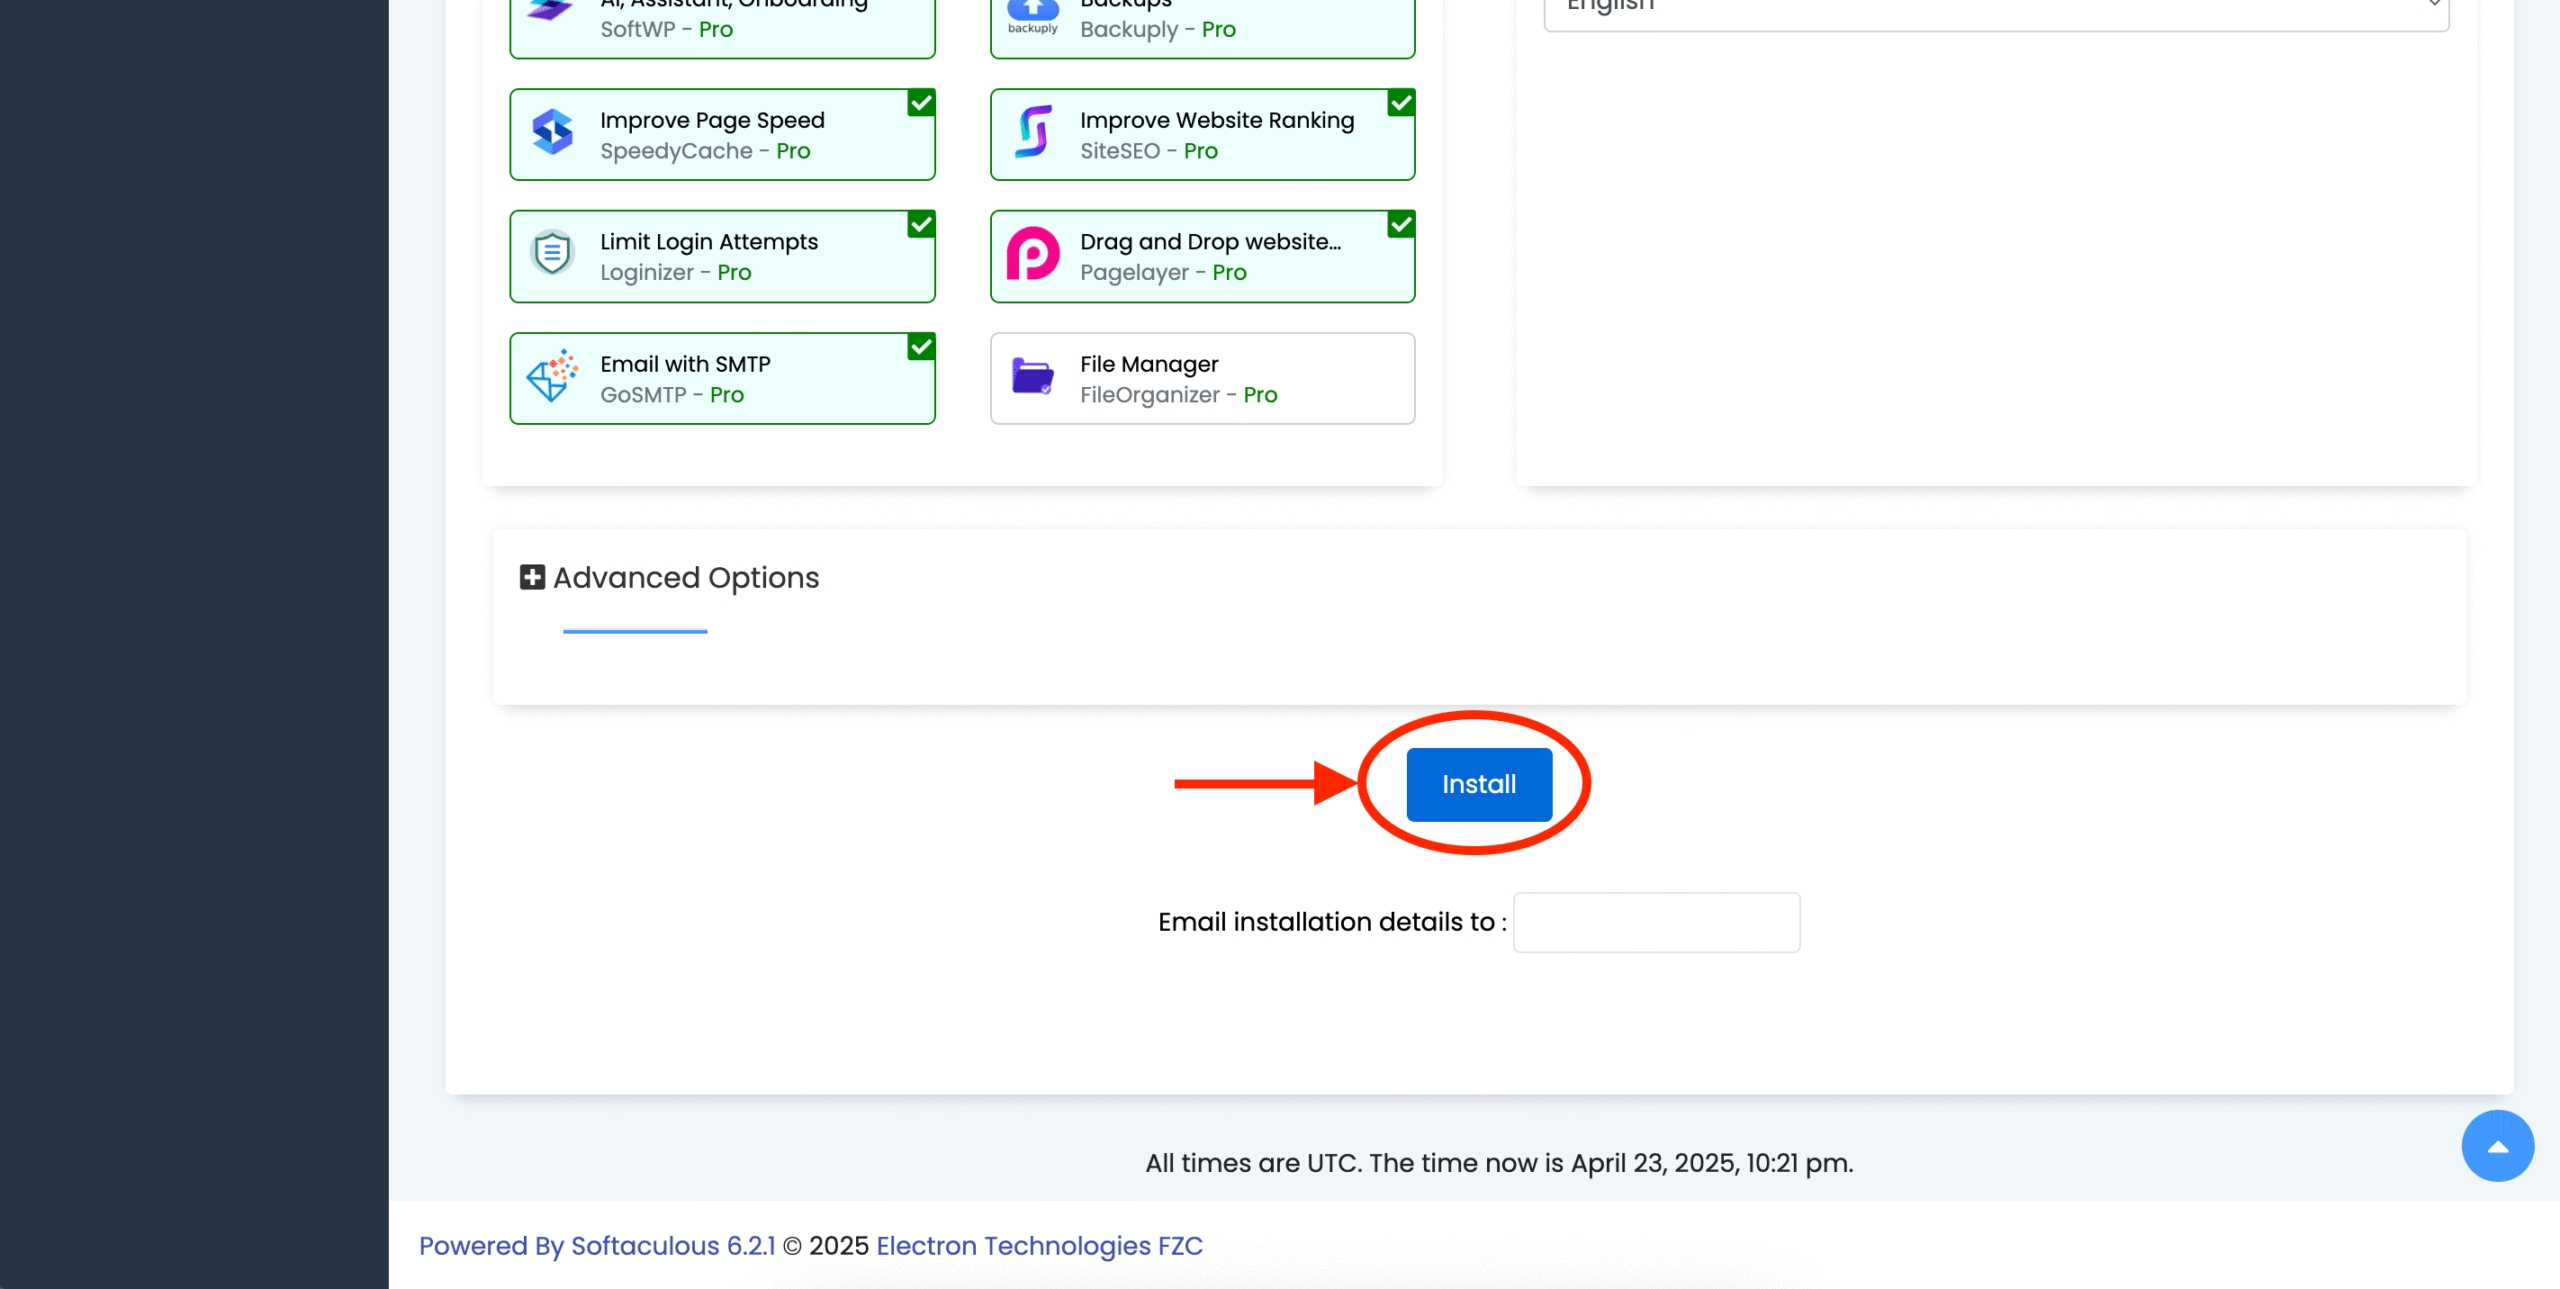
Once all the fields are filled out carefully, scroll down and click the “Install” button.
Step 5: Installation in Progress
You’ll see a progress bar indicating that WordPress is being installed on your HostMidas hosting account. This process usually takes just a few moments.
Step 6: Accessing Your WordPress Website
Once WordPress software has been successfully installed, the next page will show important details, including:
- Your Website URL: This is the address where your new WordPress website will be live (e.g.,
yourdomain.nz). - Admin URL: This is the address you’ll use to log in to your WordPress admin dashboard (usually
yourdomain.nz/wp-admin/). Click this link to start building and managing your new website!
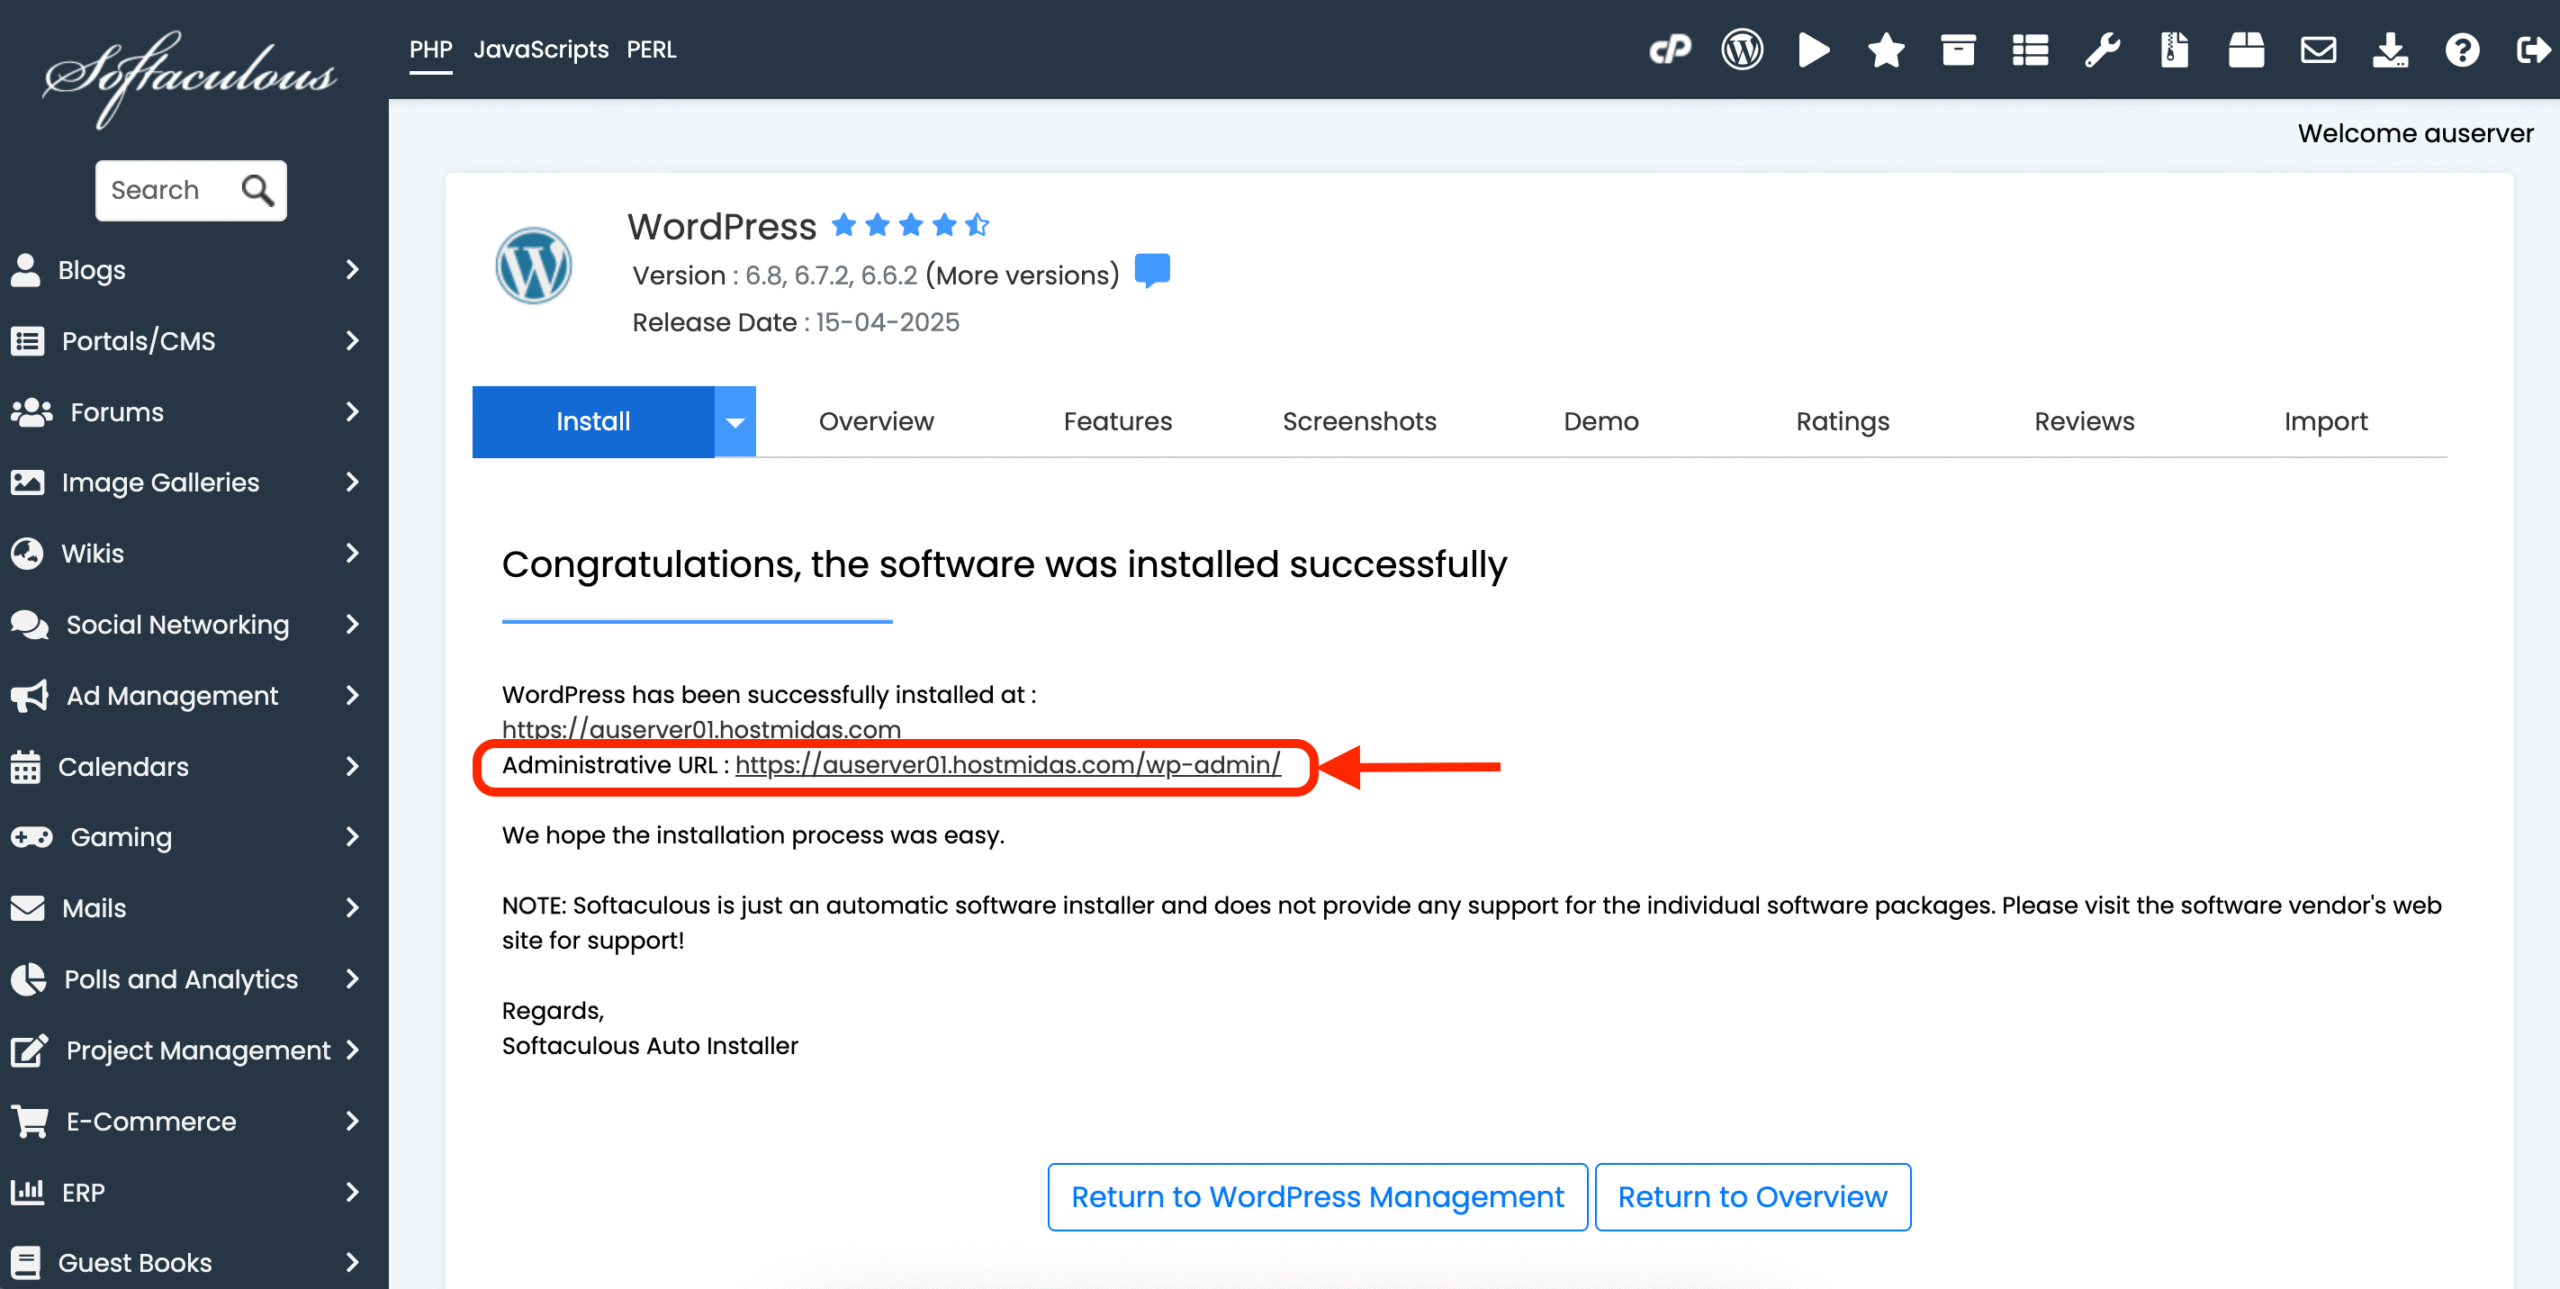
Congratulations! You’ve successfully installed WordPress using Softaculous in cPanel on your HostMidas.nz hosting account. Now you can log in to your WordPress admin area and begin creating your amazing website. If you have any questions along the way, don’t hesitate to reach out to the friendly HostMidas Support Team!
Need Help?
If you encounter any issues while setting up WordPress or need further assistance, feel free to contact HostMidas Support. We’re here to help!
Want to see what our customers are saying? Check out our Trustpilot reviews to learn why businesses choose HostMidas for reliable hosting services.
