JetBackup 5 is a powerful tool available in cPanel that allows you to easily manage and restore backups. Whether you need to restore your entire account, specific files, databases, or email accounts, JetBackup 5 makes the process simple. In this guide, we’ll show you how to restore backups using JetBackup 5 and perform a full restoration from your available daily backups.
1. Log into cPanel
Start by logging into your cPanel account. You can access cPanel by entering your domain name followed by /cpanel (e.g., yourdomain.nz/cpanel) or via HostMidas client area.

2. Locate JetBackup 5
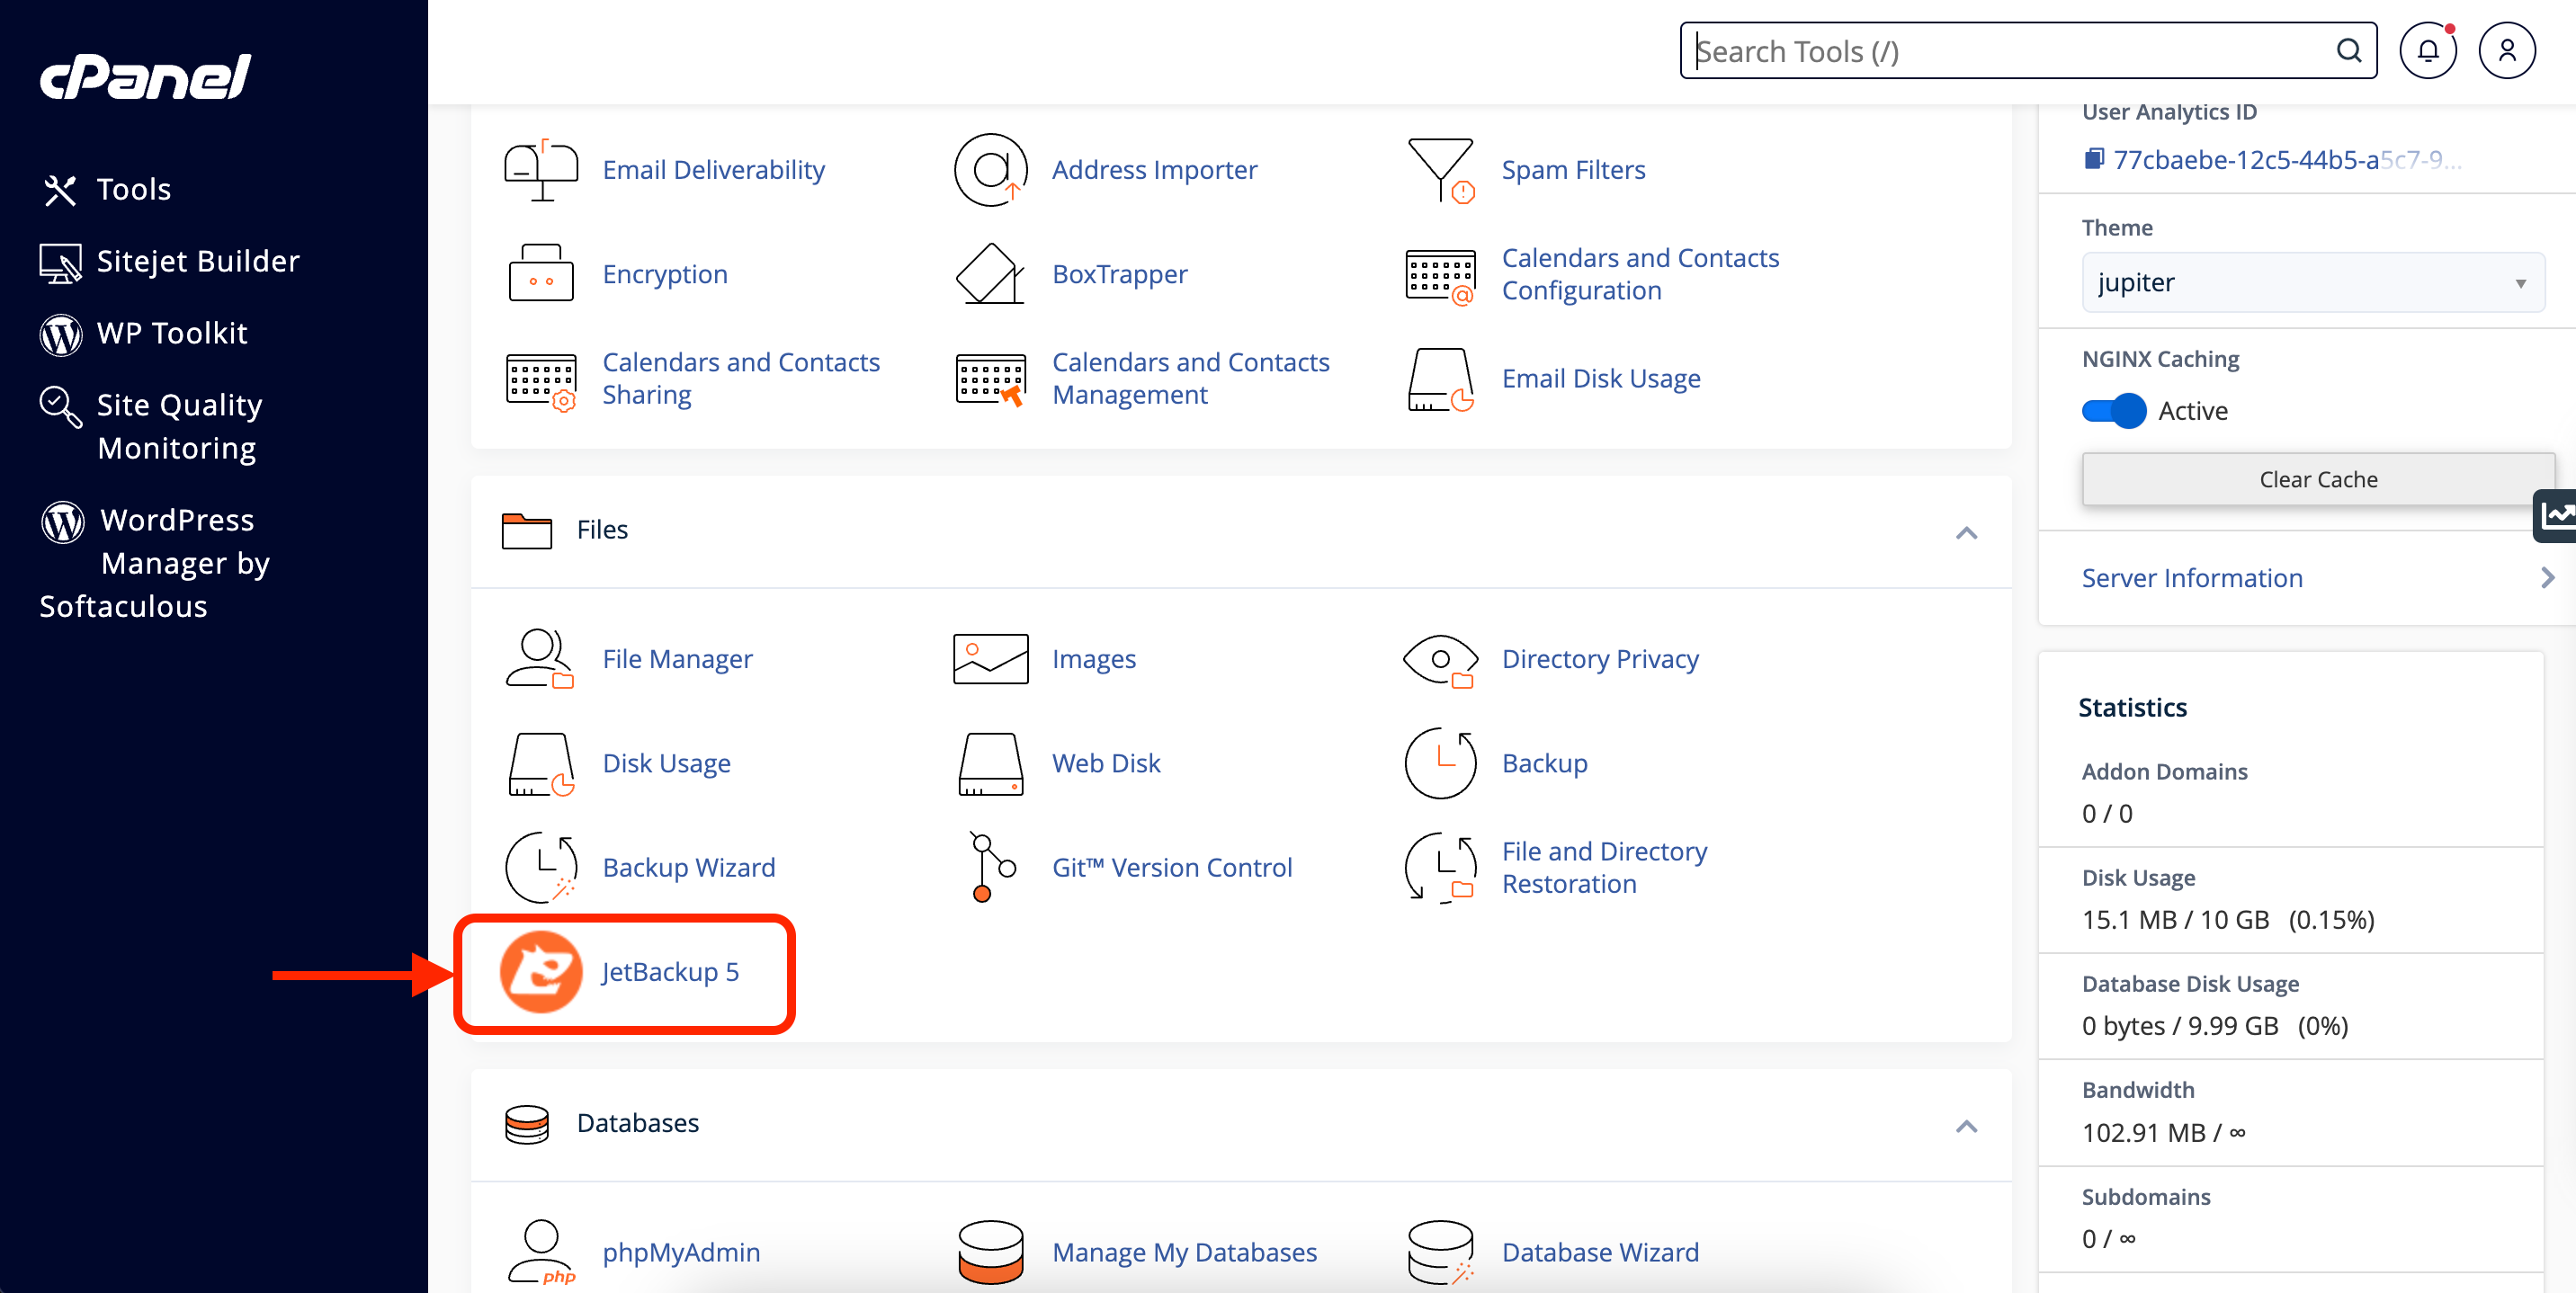
Once logged in, scroll down to the Files section. You will see the JetBackup 5 icon. Click on it to open the backup tool.

3. Select a Backup
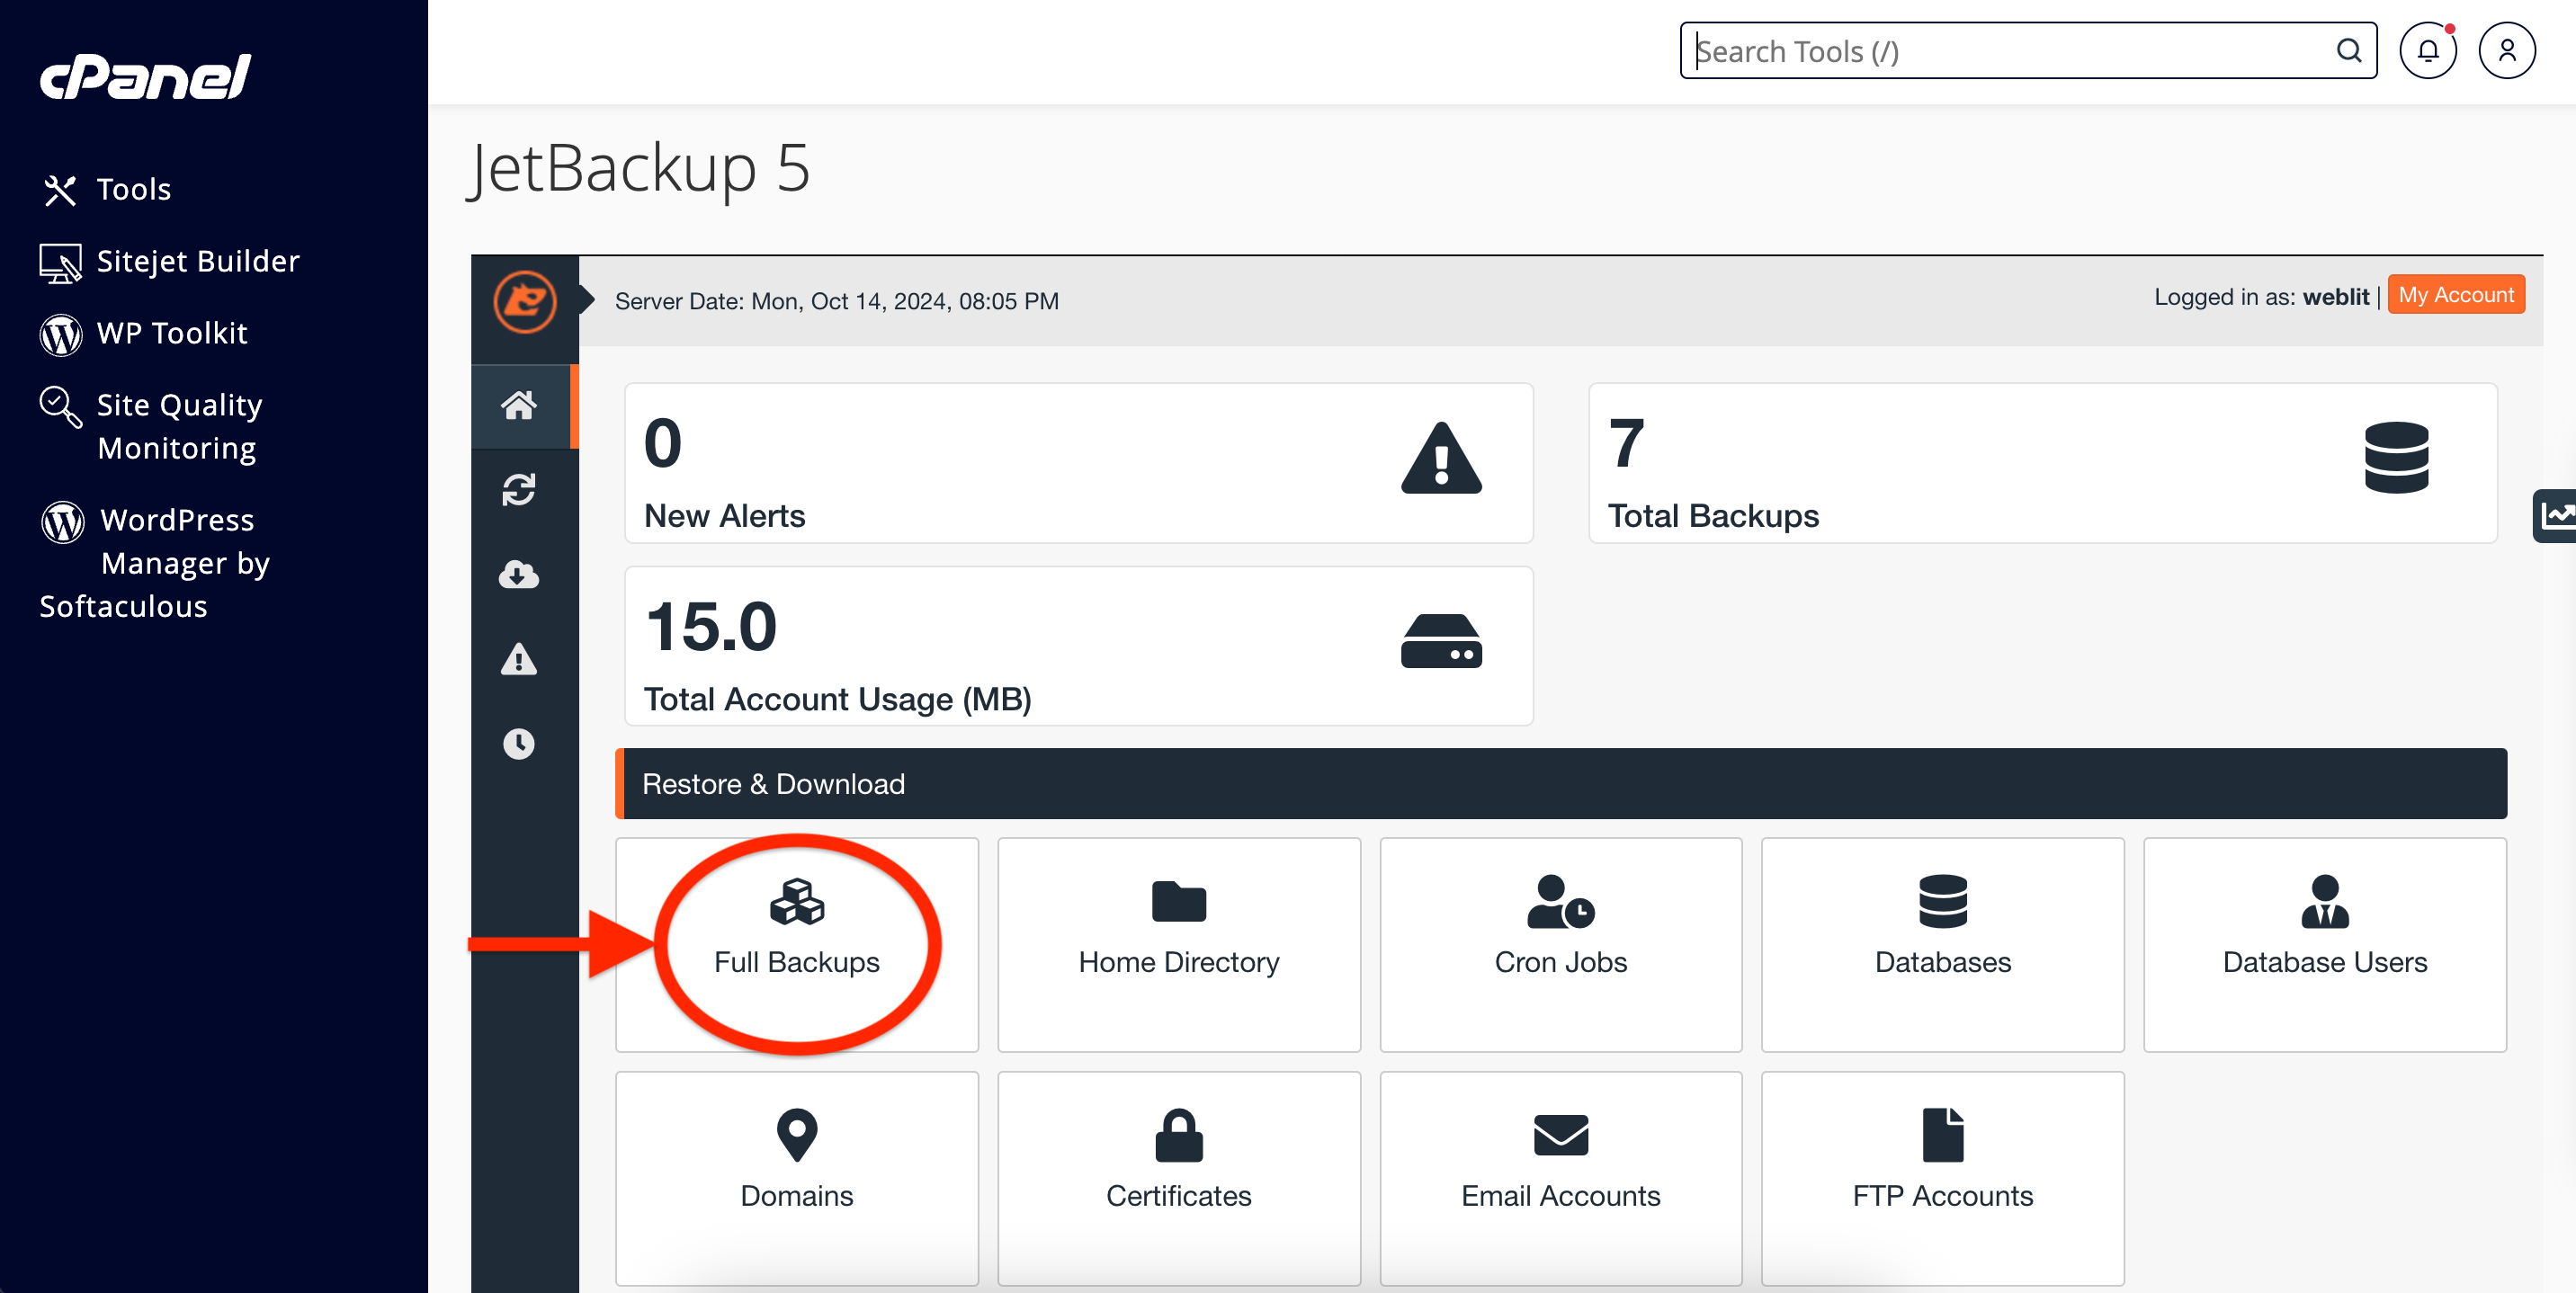
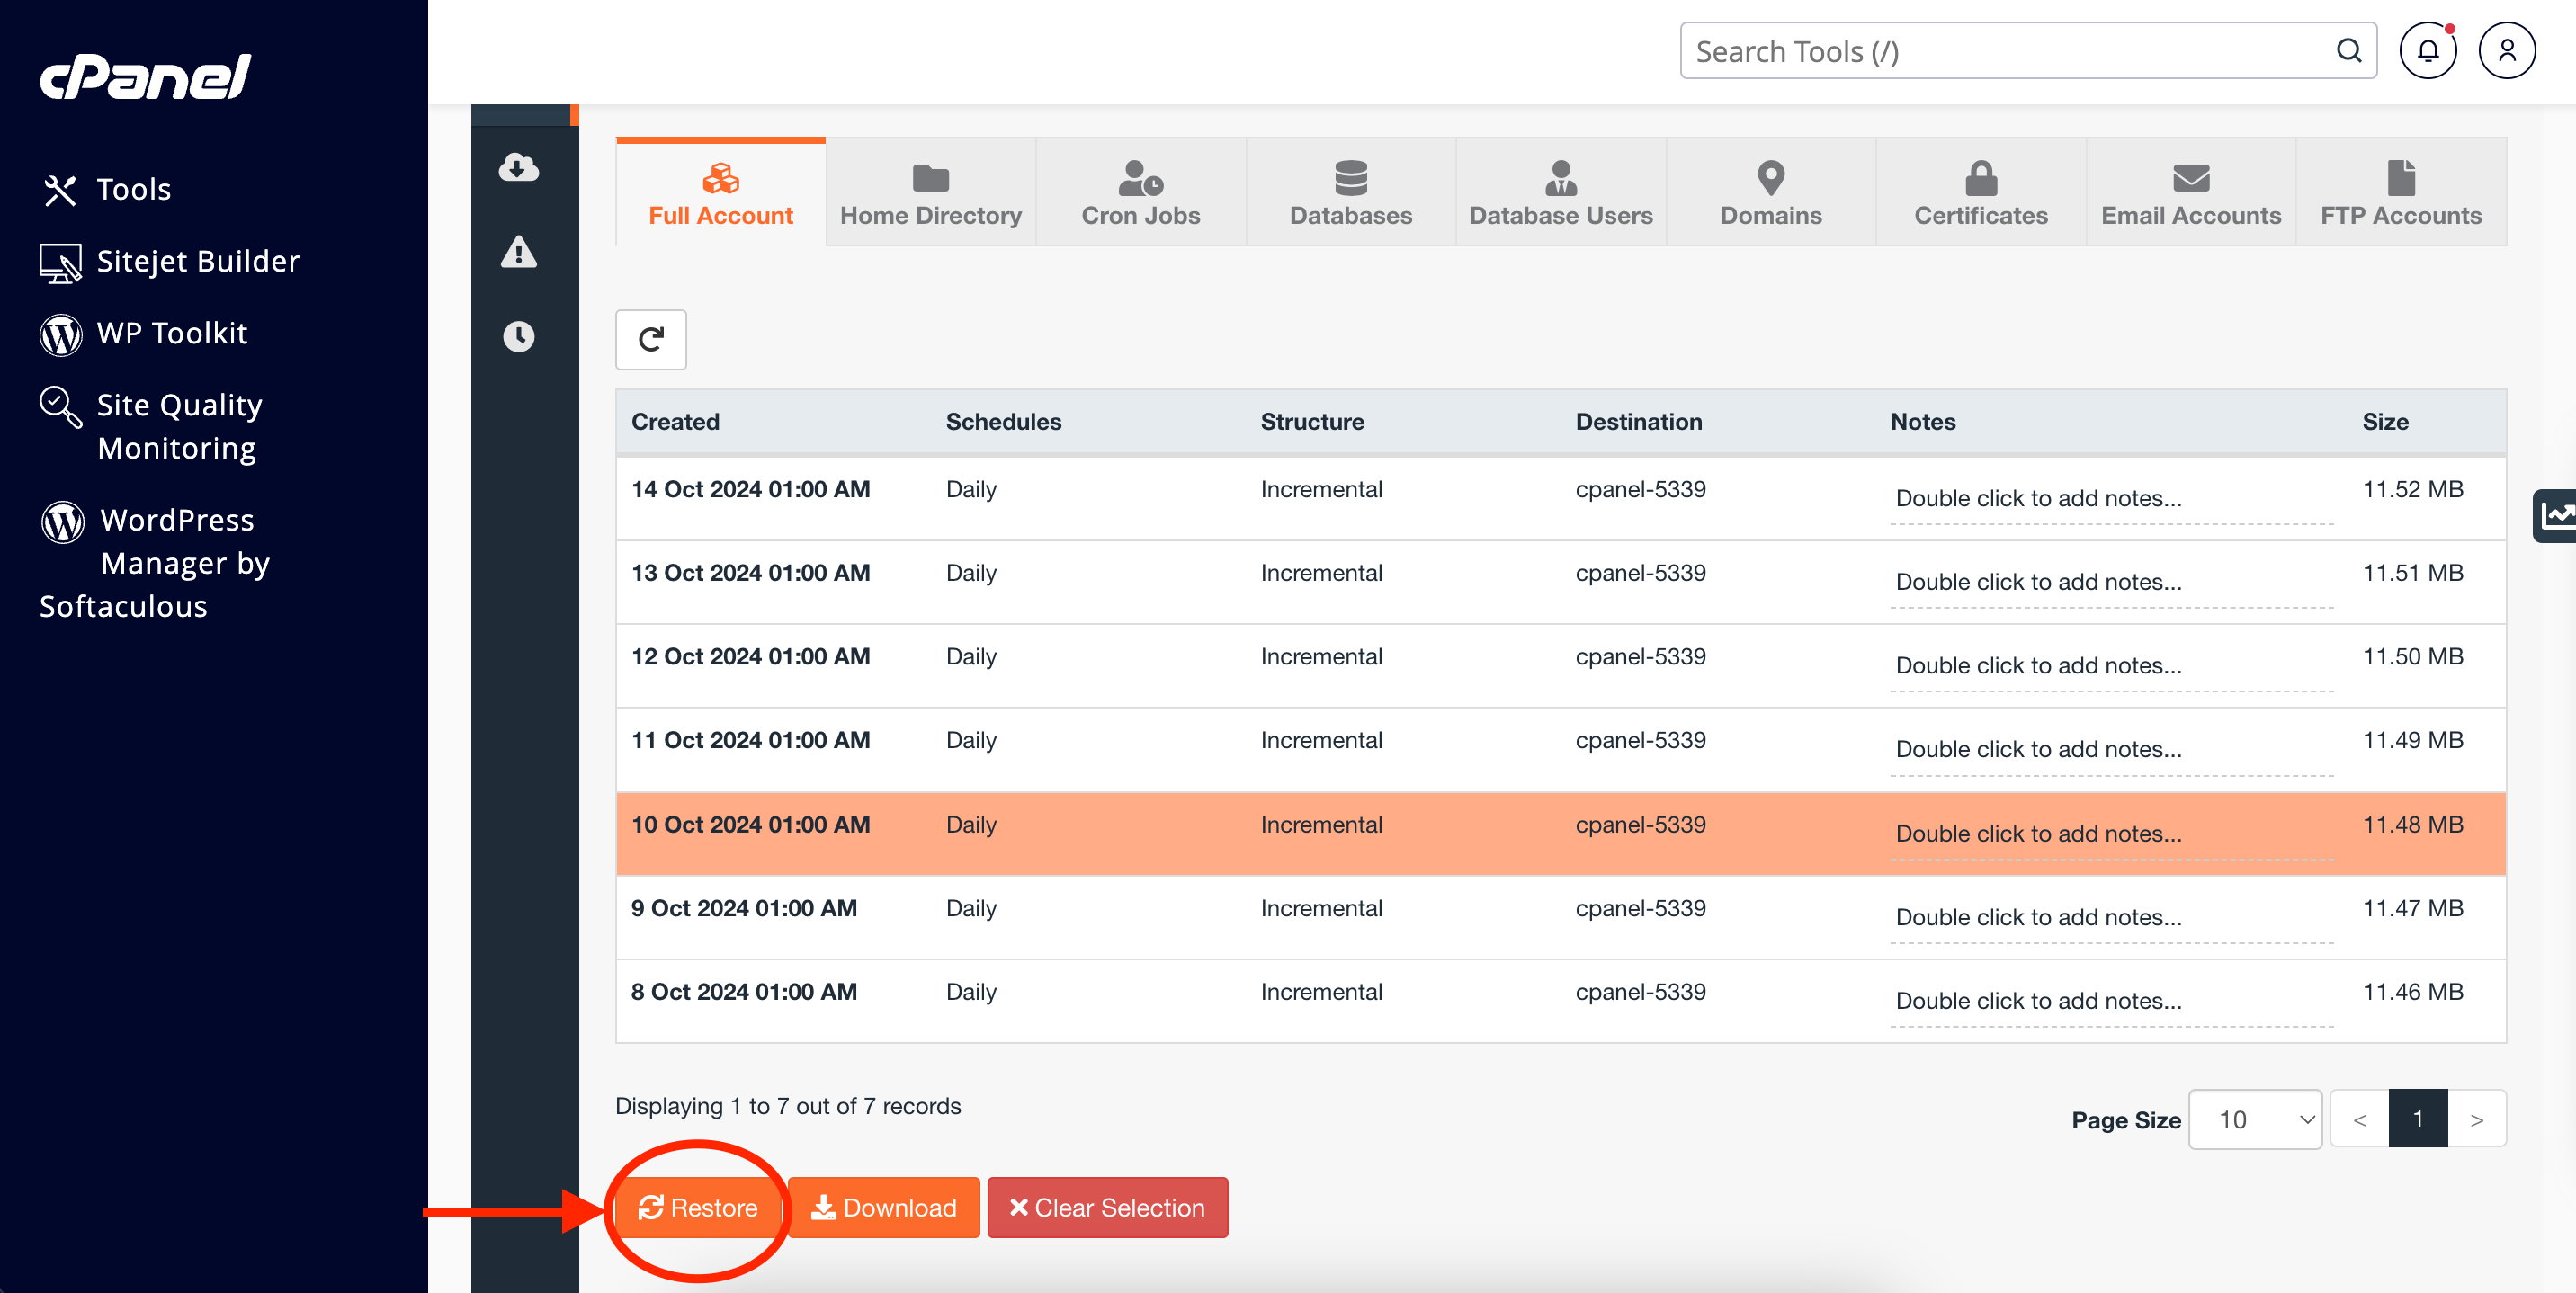
Under the Full Backups section, you will see a list of available backups. JetBackup automatically creates daily backups, and each backup shows the date and time it was created. Select the backup you want to restore.


4. Start the Restoration
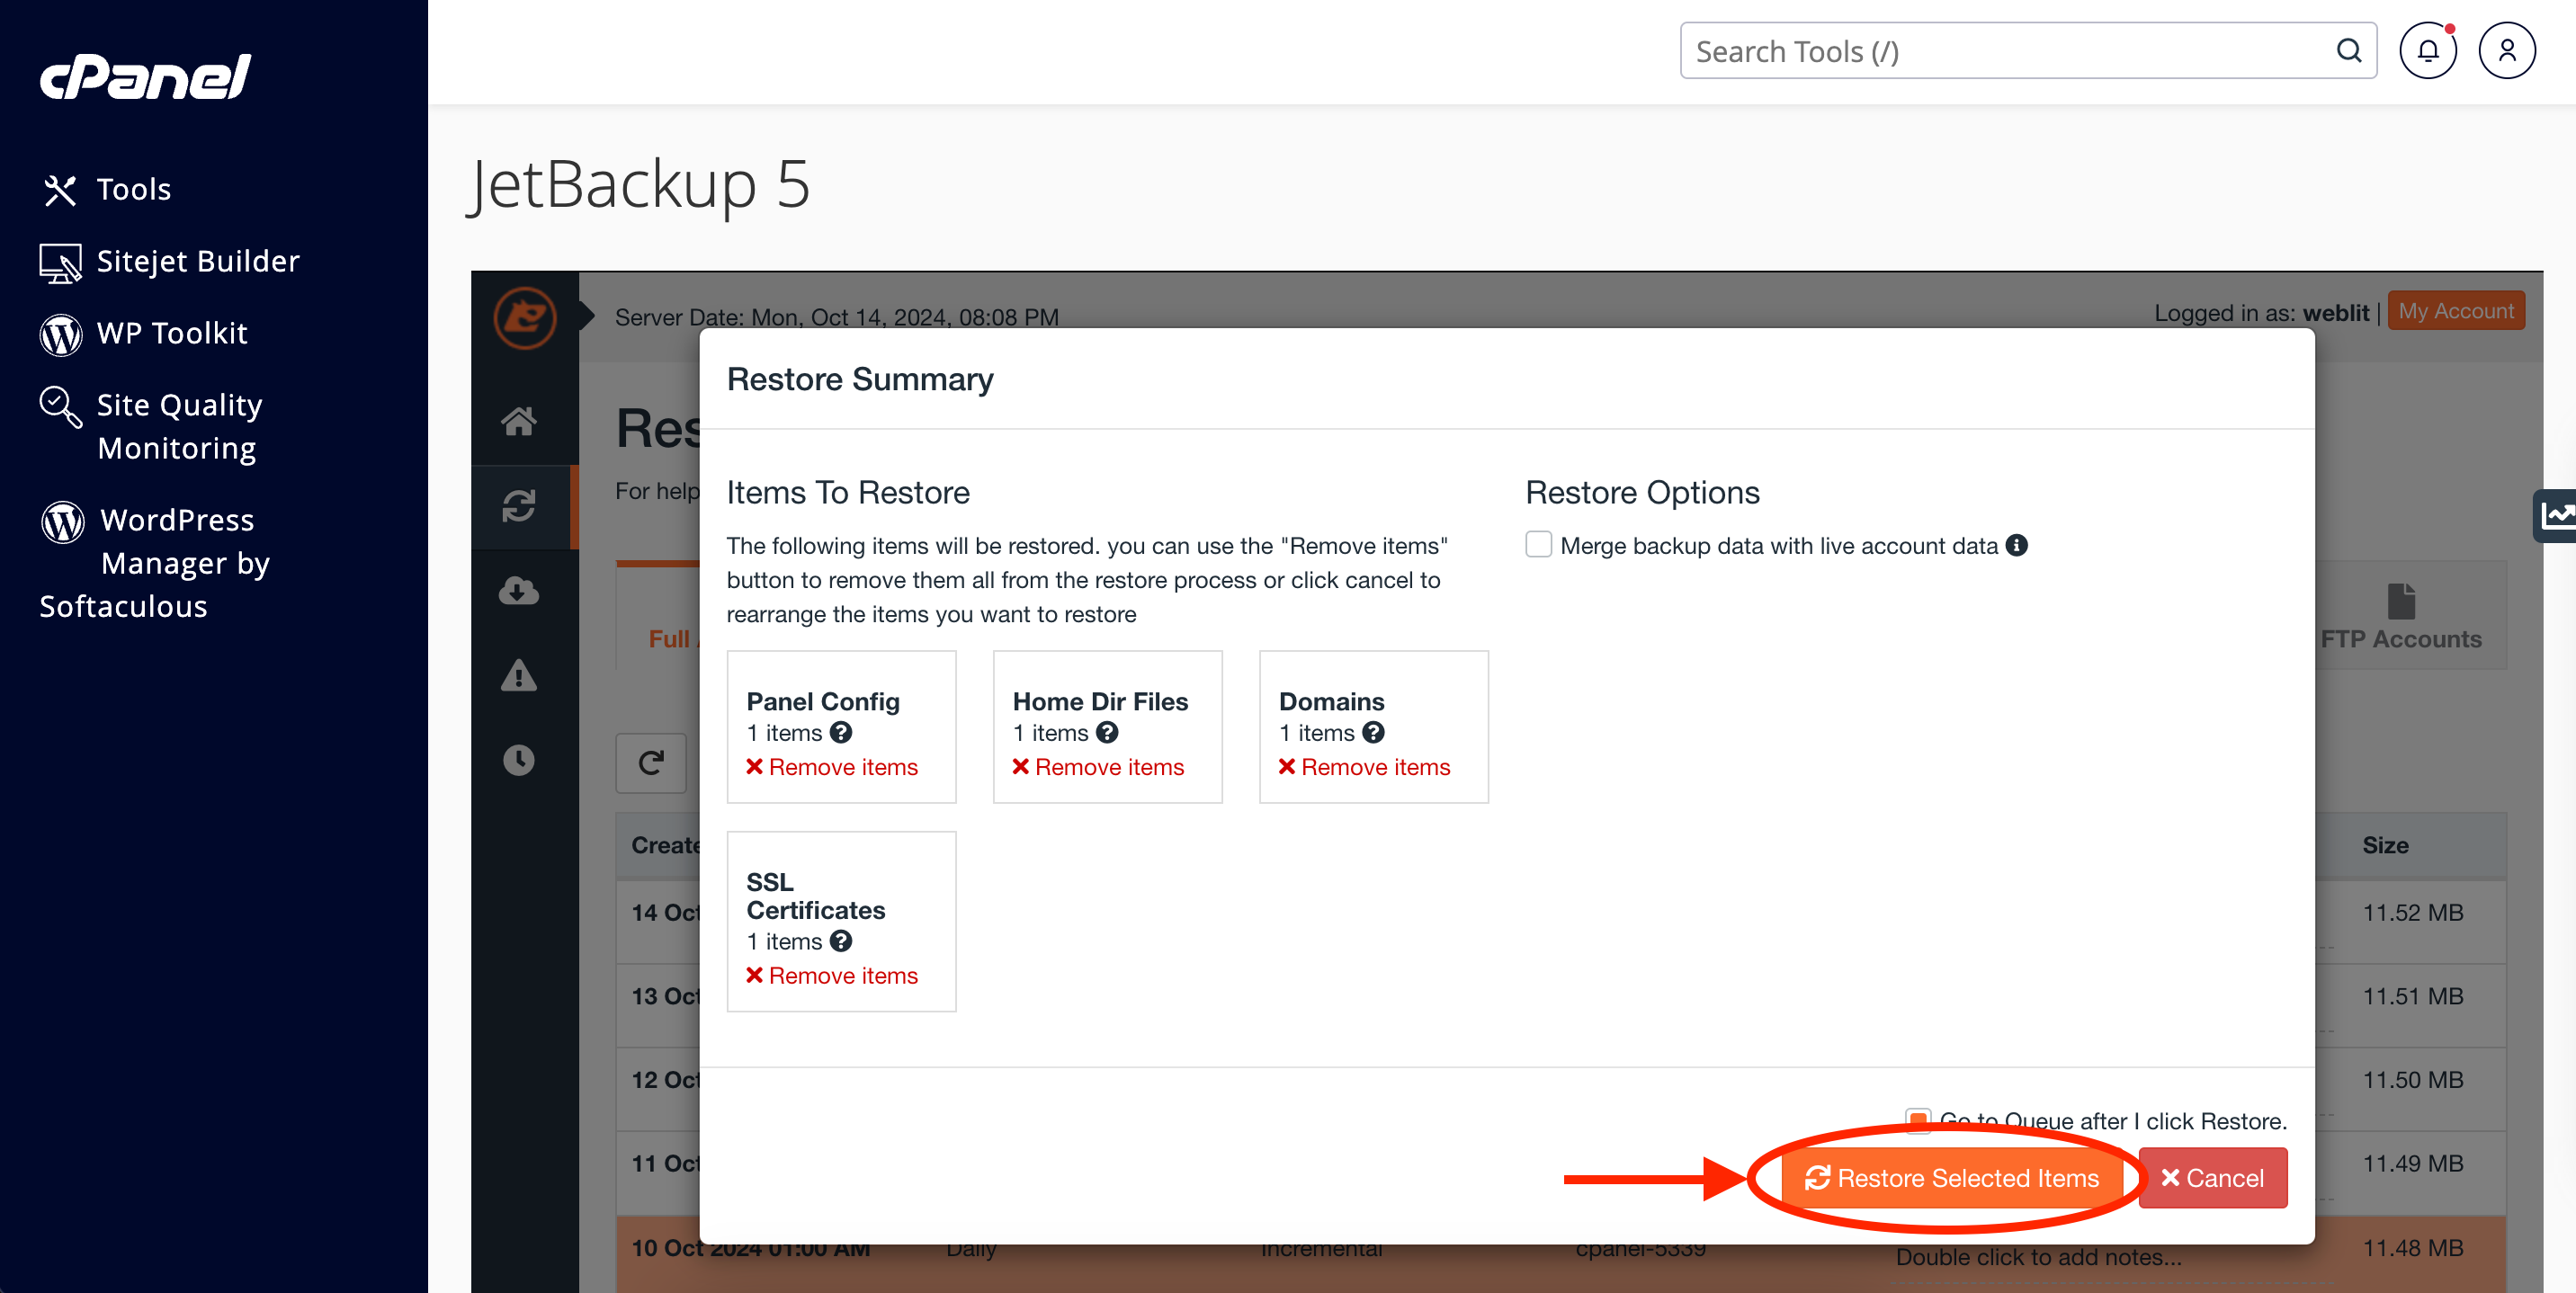
Once you have selected the appropriate backup, click the Restore button. A summary page will appear, showing the items that will be restored, including panel configuration, home directory files, domains, SSL certificates, and more.

5. Confirm the Restoration
After reviewing the items to be restored, click Restore Selected Items. The restoration process will begin, and you will be notified when it’s complete.
How to Restore Specific Items (Files, Databases, Email Accounts)
JetBackup 5 also allows you to restore specific parts of your account if you don’t need a full restoration. Here’s how:
1. Restore Files Only
In JetBackup 5, go to the Home Directory tab. Select the desired backup and click Restore. This will restore your website files without affecting databases or emails.
2. Restore Databases Only
To restore a database, navigate to the Databases tab in JetBackup 5. Choose the backup date and select the database you want to restore. Click Restore to begin the process.
3. Restore Email Accounts Only
If you need to restore email accounts, go to the Email Accounts tab in JetBackup 5. Select the backup and email accounts you want to restore, then click Restore.
JetBackup 5 in cPanel makes it easy to restore your entire account or just specific parts, such as files, databases, or emails. Whether you’re dealing with a technical issue or just want to revert to a previous version, JetBackup gives you full control over your restorations.
Need Help?
If you encounter any issues restoring data using JetBackup 5 or need further assistance, feel free to email [email protected]. We’re here to help!
Want to see what our customers are saying? Check out our Trustpilot reviews to learn why businesses choose HostMidas for reliable hosting services.
