Learning how to add a domain in cPanel is a fundamental skill for managing multiple websites or directing different domain names to specific content, all from a single hosting plan. At HostMidas.nz, we make it easy to manage your domains directly through your cPanel interface. This guide will walk you through the simple steps to add a new domain.
Prerequisites:
Before you begin, ensure your domain name is:
- Already registered.
- Pointing its nameservers to your HostMidas.nz hosting account. (If you’re unsure how to do this, please contact our support team).
1. Log into cPanel
Start by logging into your cPanel account. You may use the one-click log in on the HostMidas client area.

2. Access the Domains Interface in cPanel
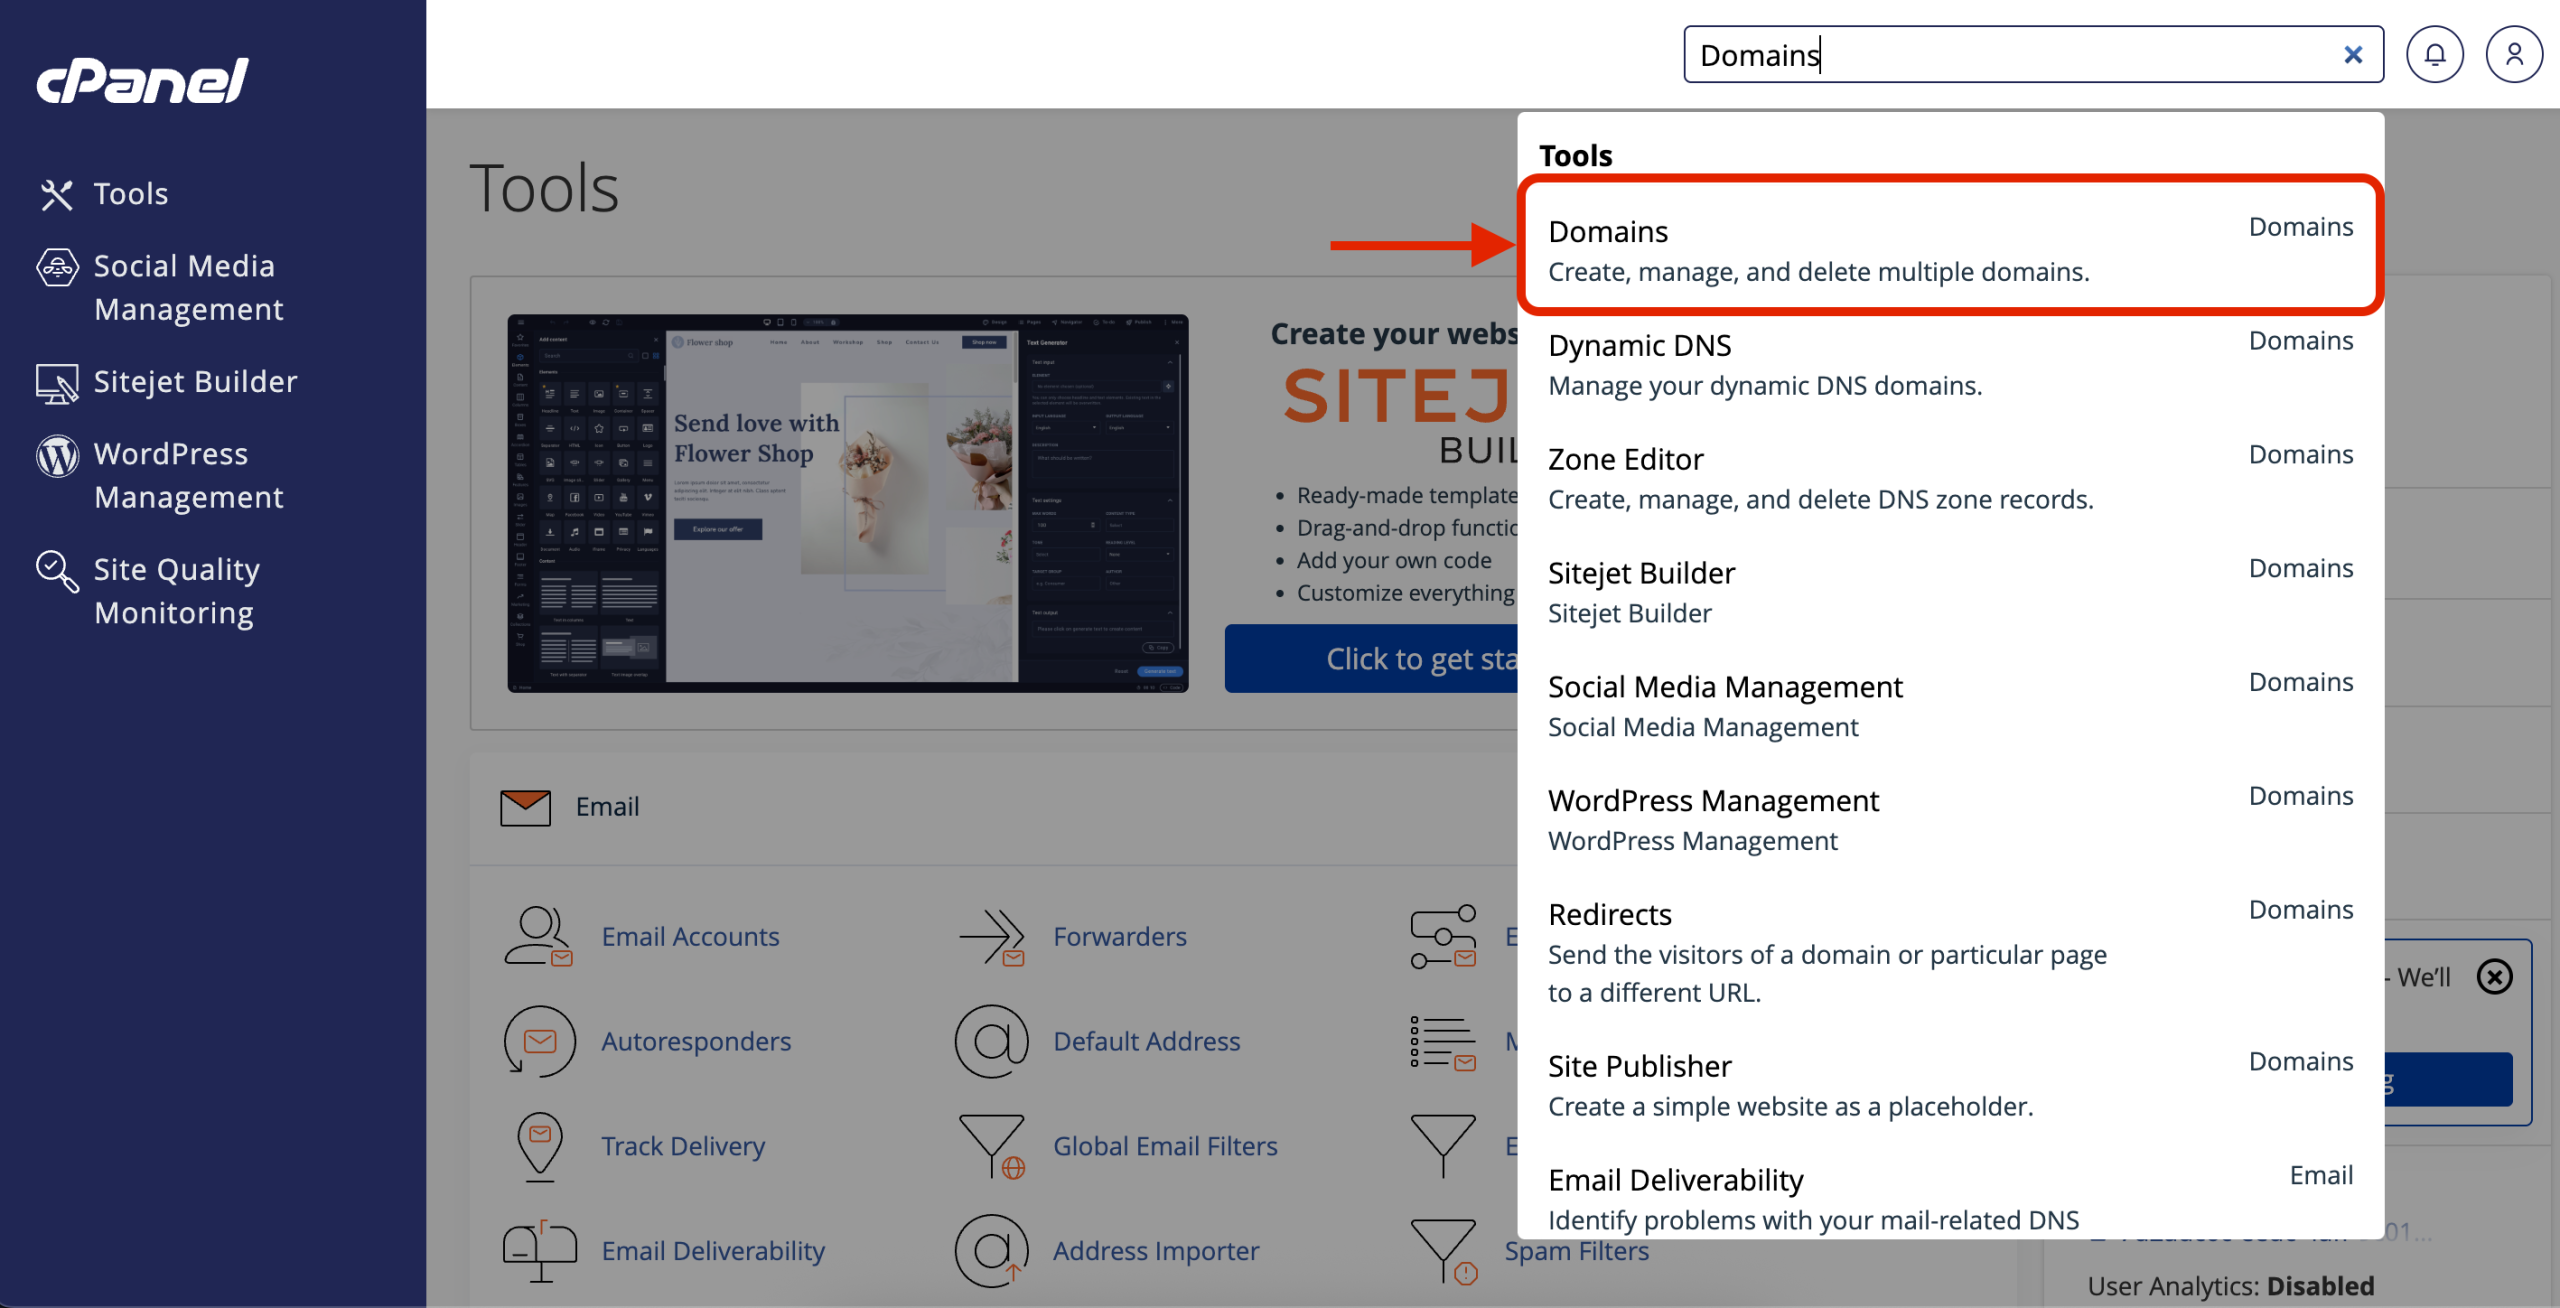
In the “Tools” search bar (or within the “Domains” section), type “Domains” and click on the “Domains” icon. This option allows you to create, manage, and delete multiple domains for your hosting account..

Step 2: Initiate New Domain Creation
1. On the “Domains” page, you will see a list of your existing domains.
2. Click on the blue “Create A New Domain” button.

Step 3: Enter Your Domain Details
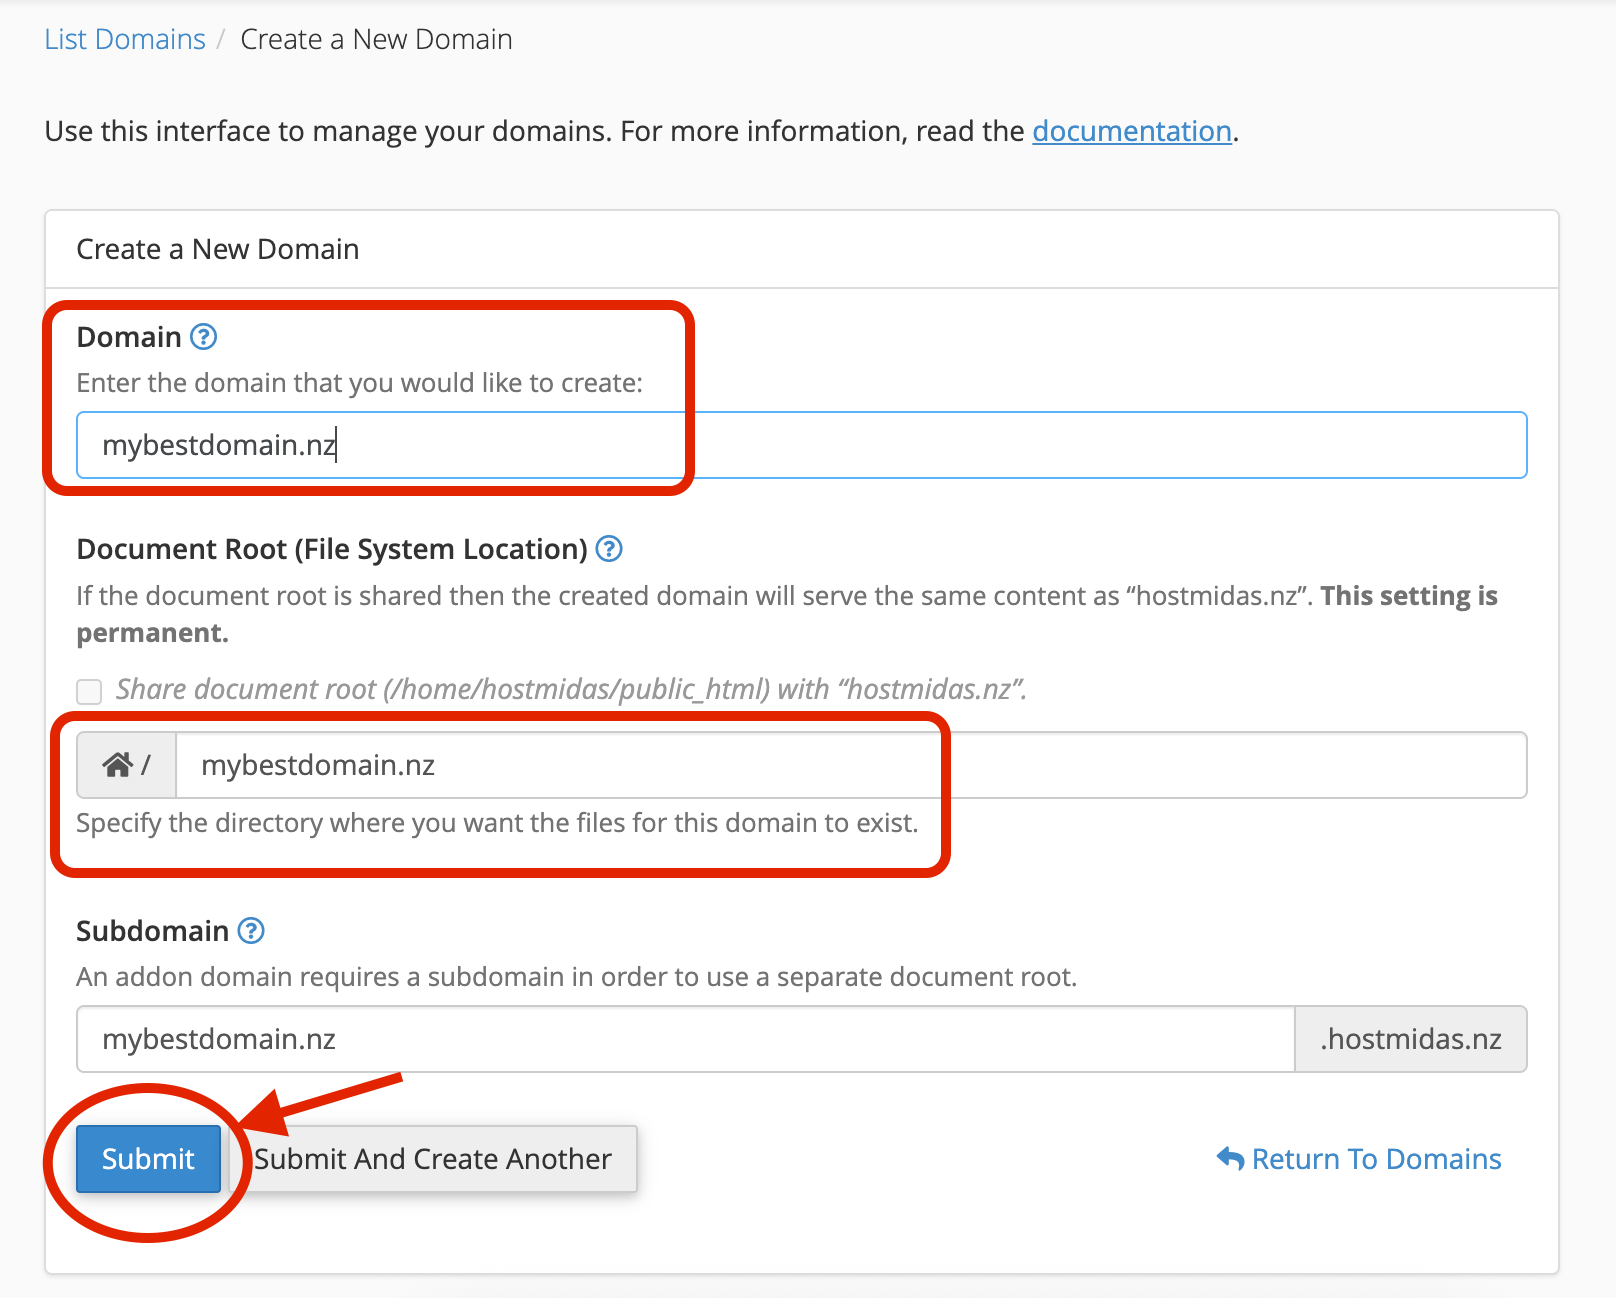
1. In the “Domain” field, enter the full domain name you wish to add (e.g., mybestdomain.nz).
2. The “Document Root (File System Location)” will automatically suggest a directory for your new domain (e.g., /home/mybestdomain.nz). This is where you will upload the website files for this specific domain. You can typically leave this as the default setting.
- Important Note: If you check the “Share document root” option, the new domain will serve the exact same content as your primary domain (
hostmidas.nz). This setting is permanent once set.
3. Click the “Submit” button to finalize the creation of the new domain.

What Happens Next?
-
DNS Propagation: After successfully adding the domain in cPanel, if your domain is registered with another provider, you might need to update its nameservers or modify its A record to point it towards HostMidas. It may then take some time (typically 4-24 hours) for DNS changes to fully propagate across the internet. During this period, your new domain might not be immediately accessible everywhere.
-
Uploading Your Website Files: Once the domain is added and DNS has propagated, you can upload your website files to the “Document Root” directory you specified in Step 3 (e.g.,
/home/mybestdomain.nz). You can easily do this via cPanel’s File Manager or your preferred FTP client.
Need Help?
If you encounter any issues adding a domain in cPanel or need further assistance, feel free to email [email protected]. We’re here to help!
Want to see what our customers are saying? Check out our Trustpilot reviews to learn why businesses choose HostMidas for reliable hosting services.
