When managing your website’s hosting, modifying DNS records is essential for controlling your domain settings. Whether you’re updating your A records, MX records, or setting up a custom CNAME, this guide will show you how to modify DNS records in cPanel.
1. Log into cPanel
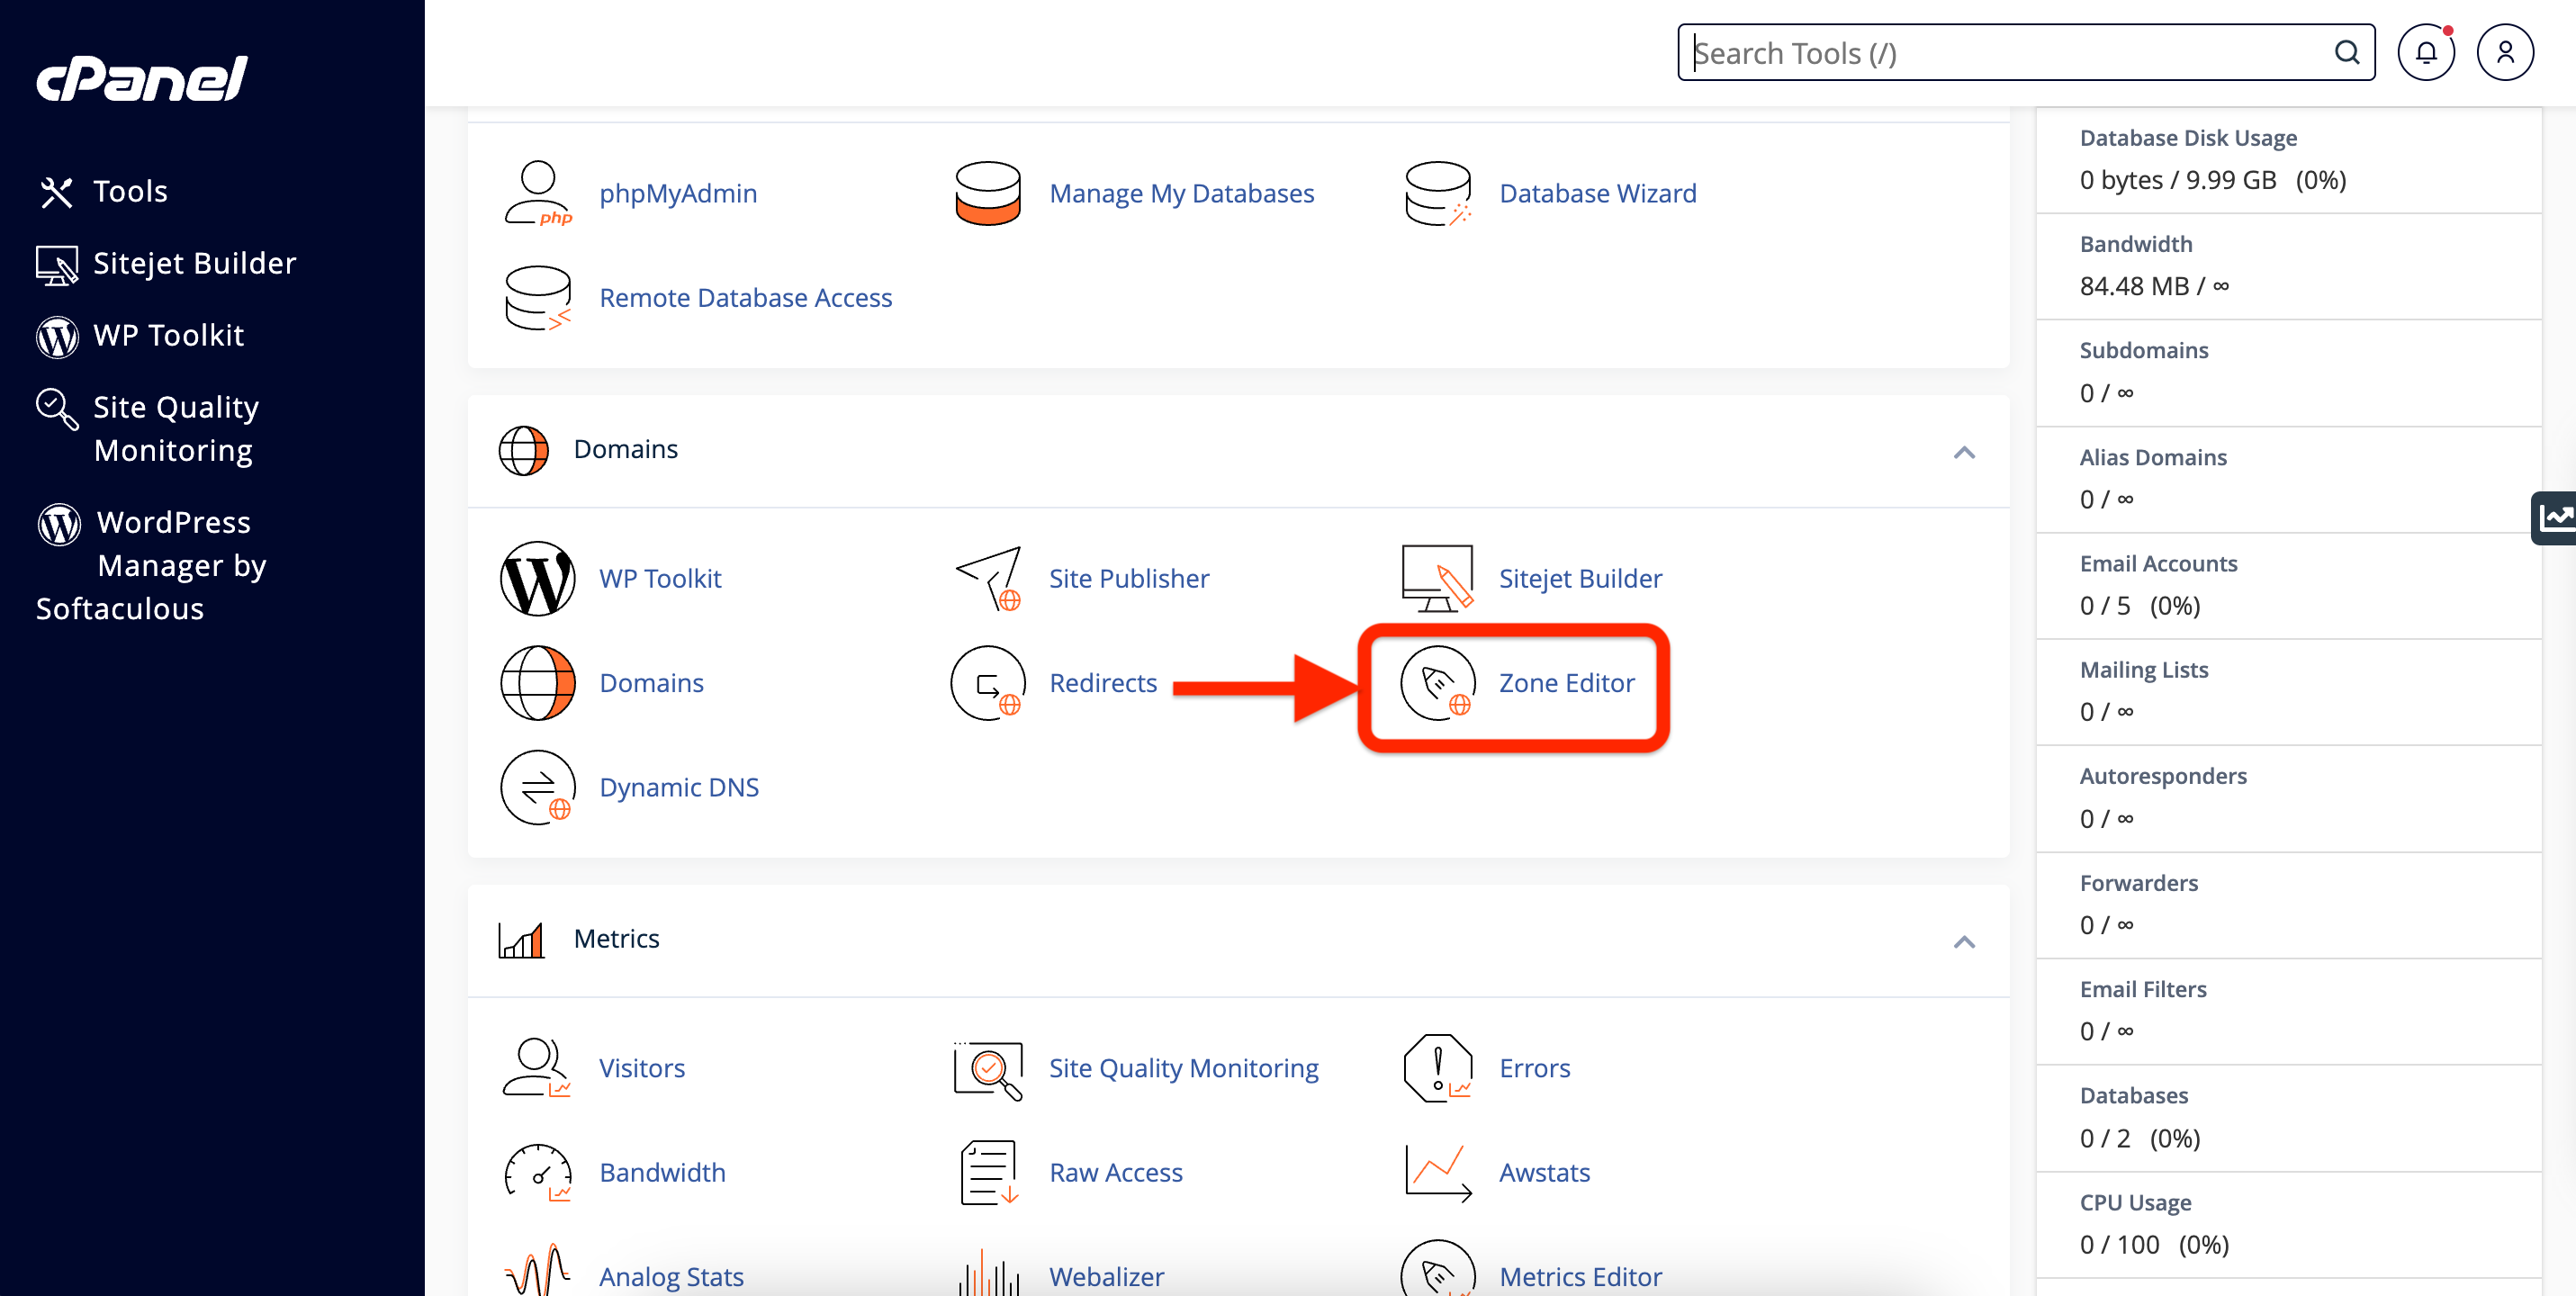
Start by logging into your cPanel account. Once you’re in, navigate to the Domains section.

2. Access the Zone Editor
In the Domains section, click on Zone Editor. This is where you’ll be able to manage your DNS records.

3. Select Your Domain
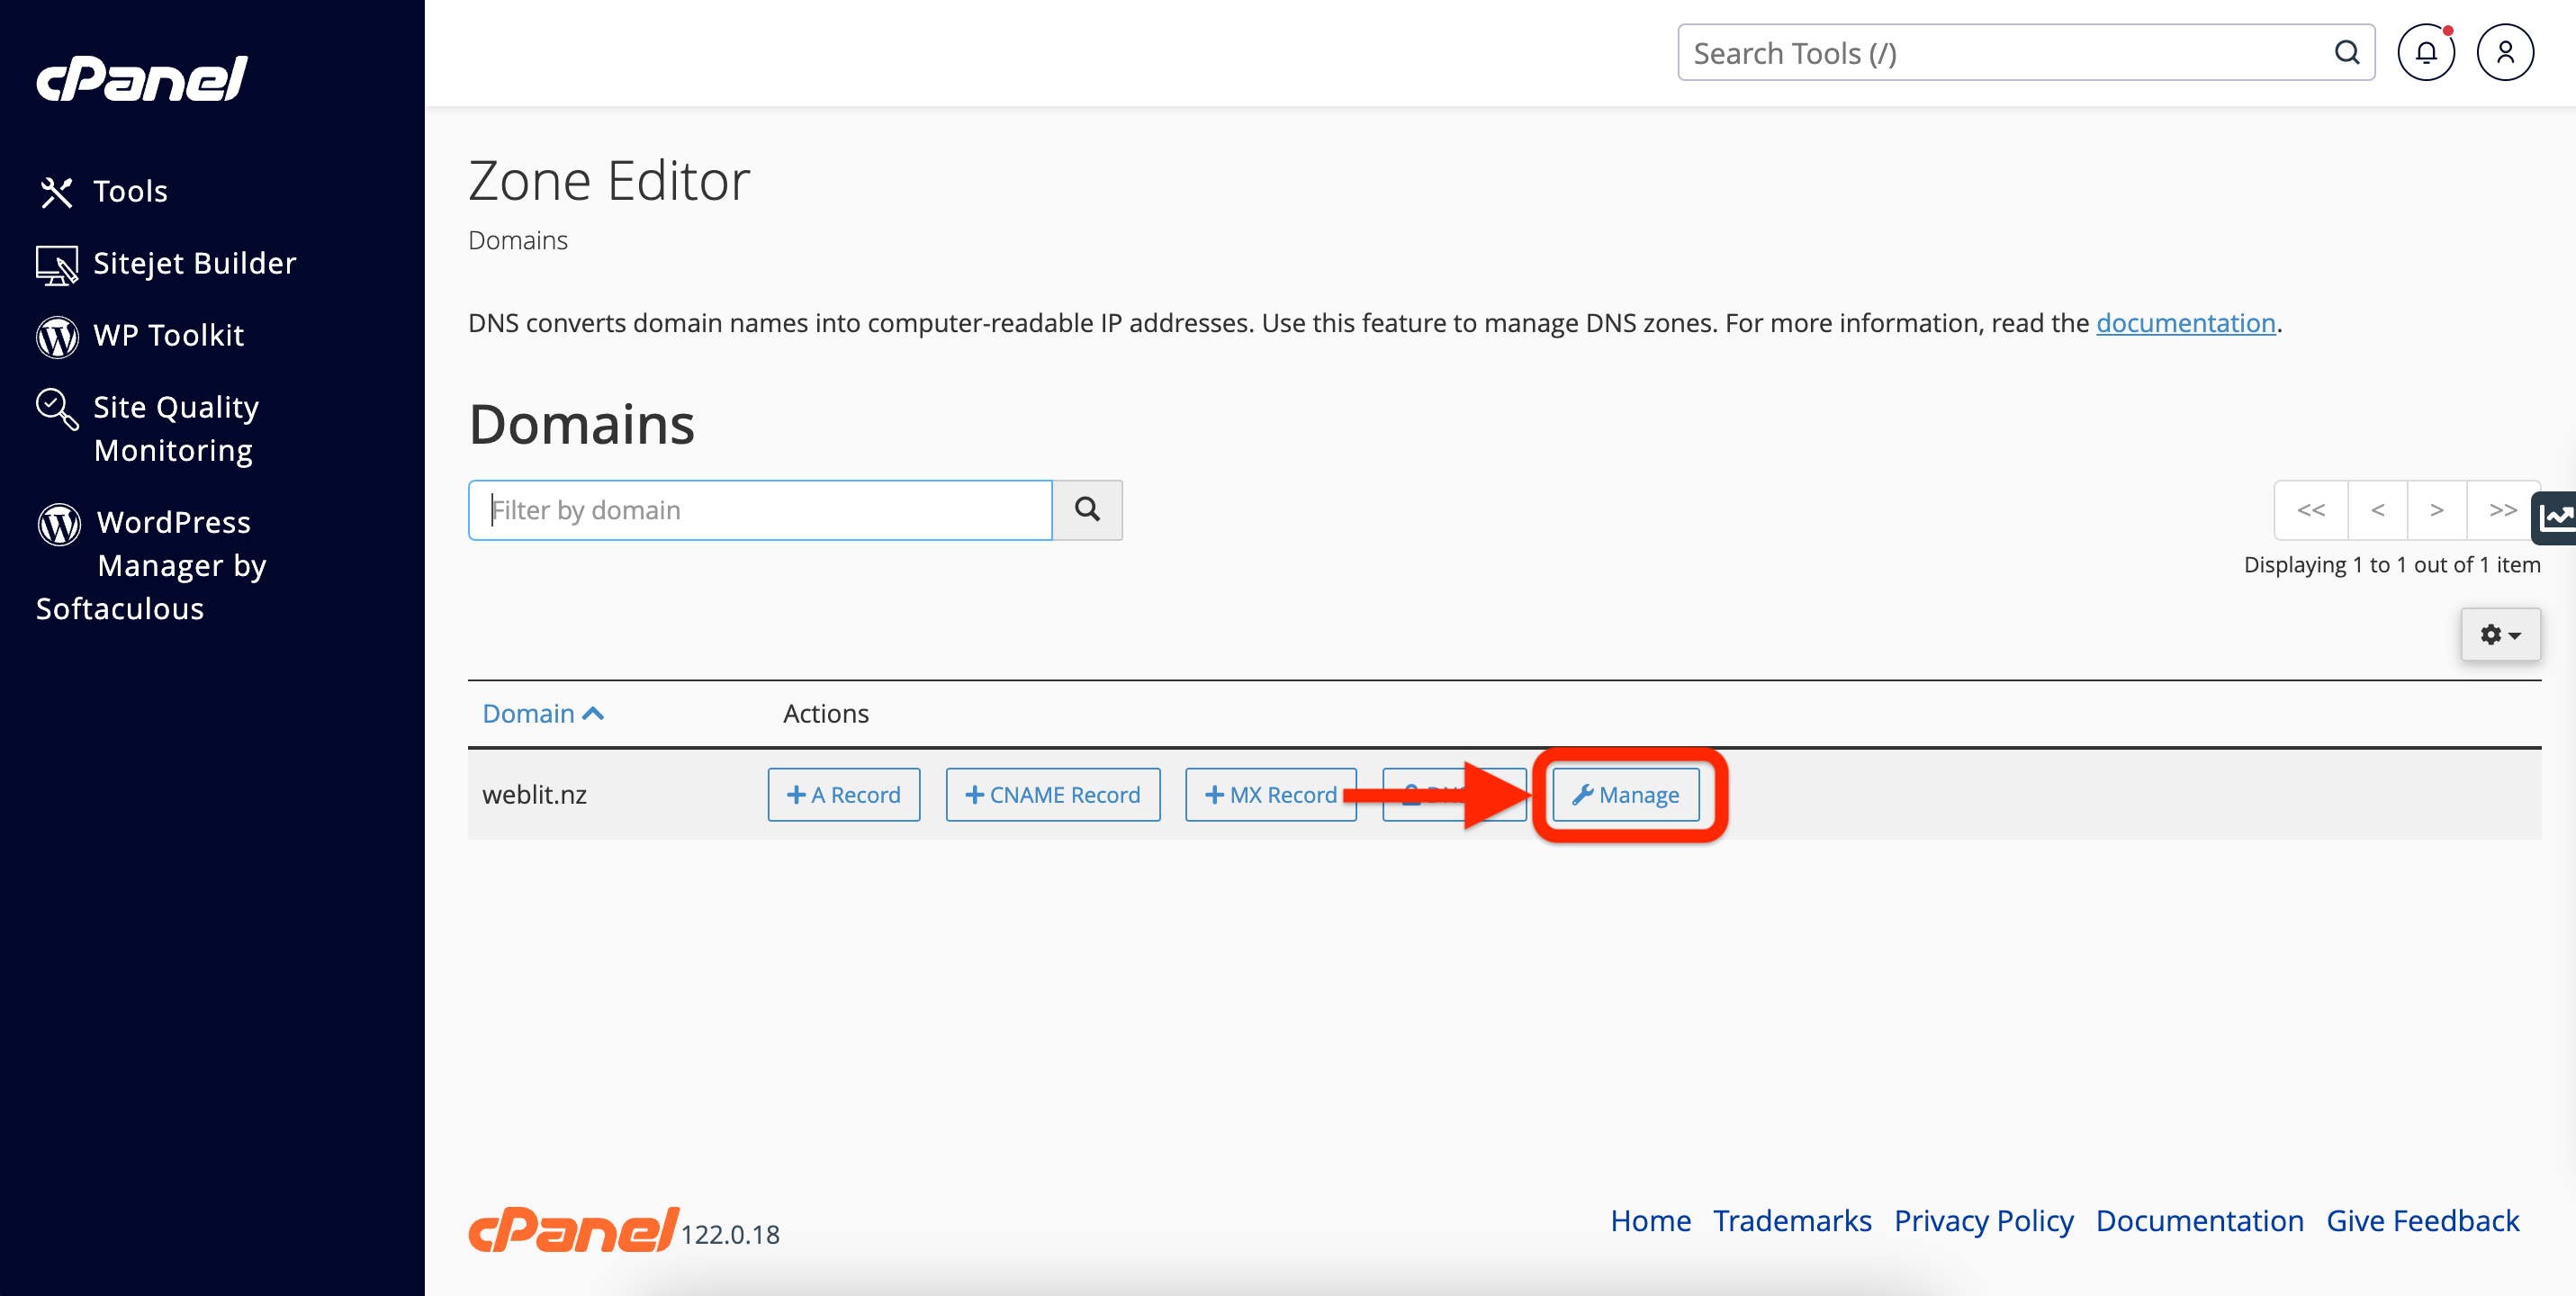
You will see a list of domains associated with your account. Find the domain you want to modify and click Manage next to it.

4. Add or Modify DNS Records
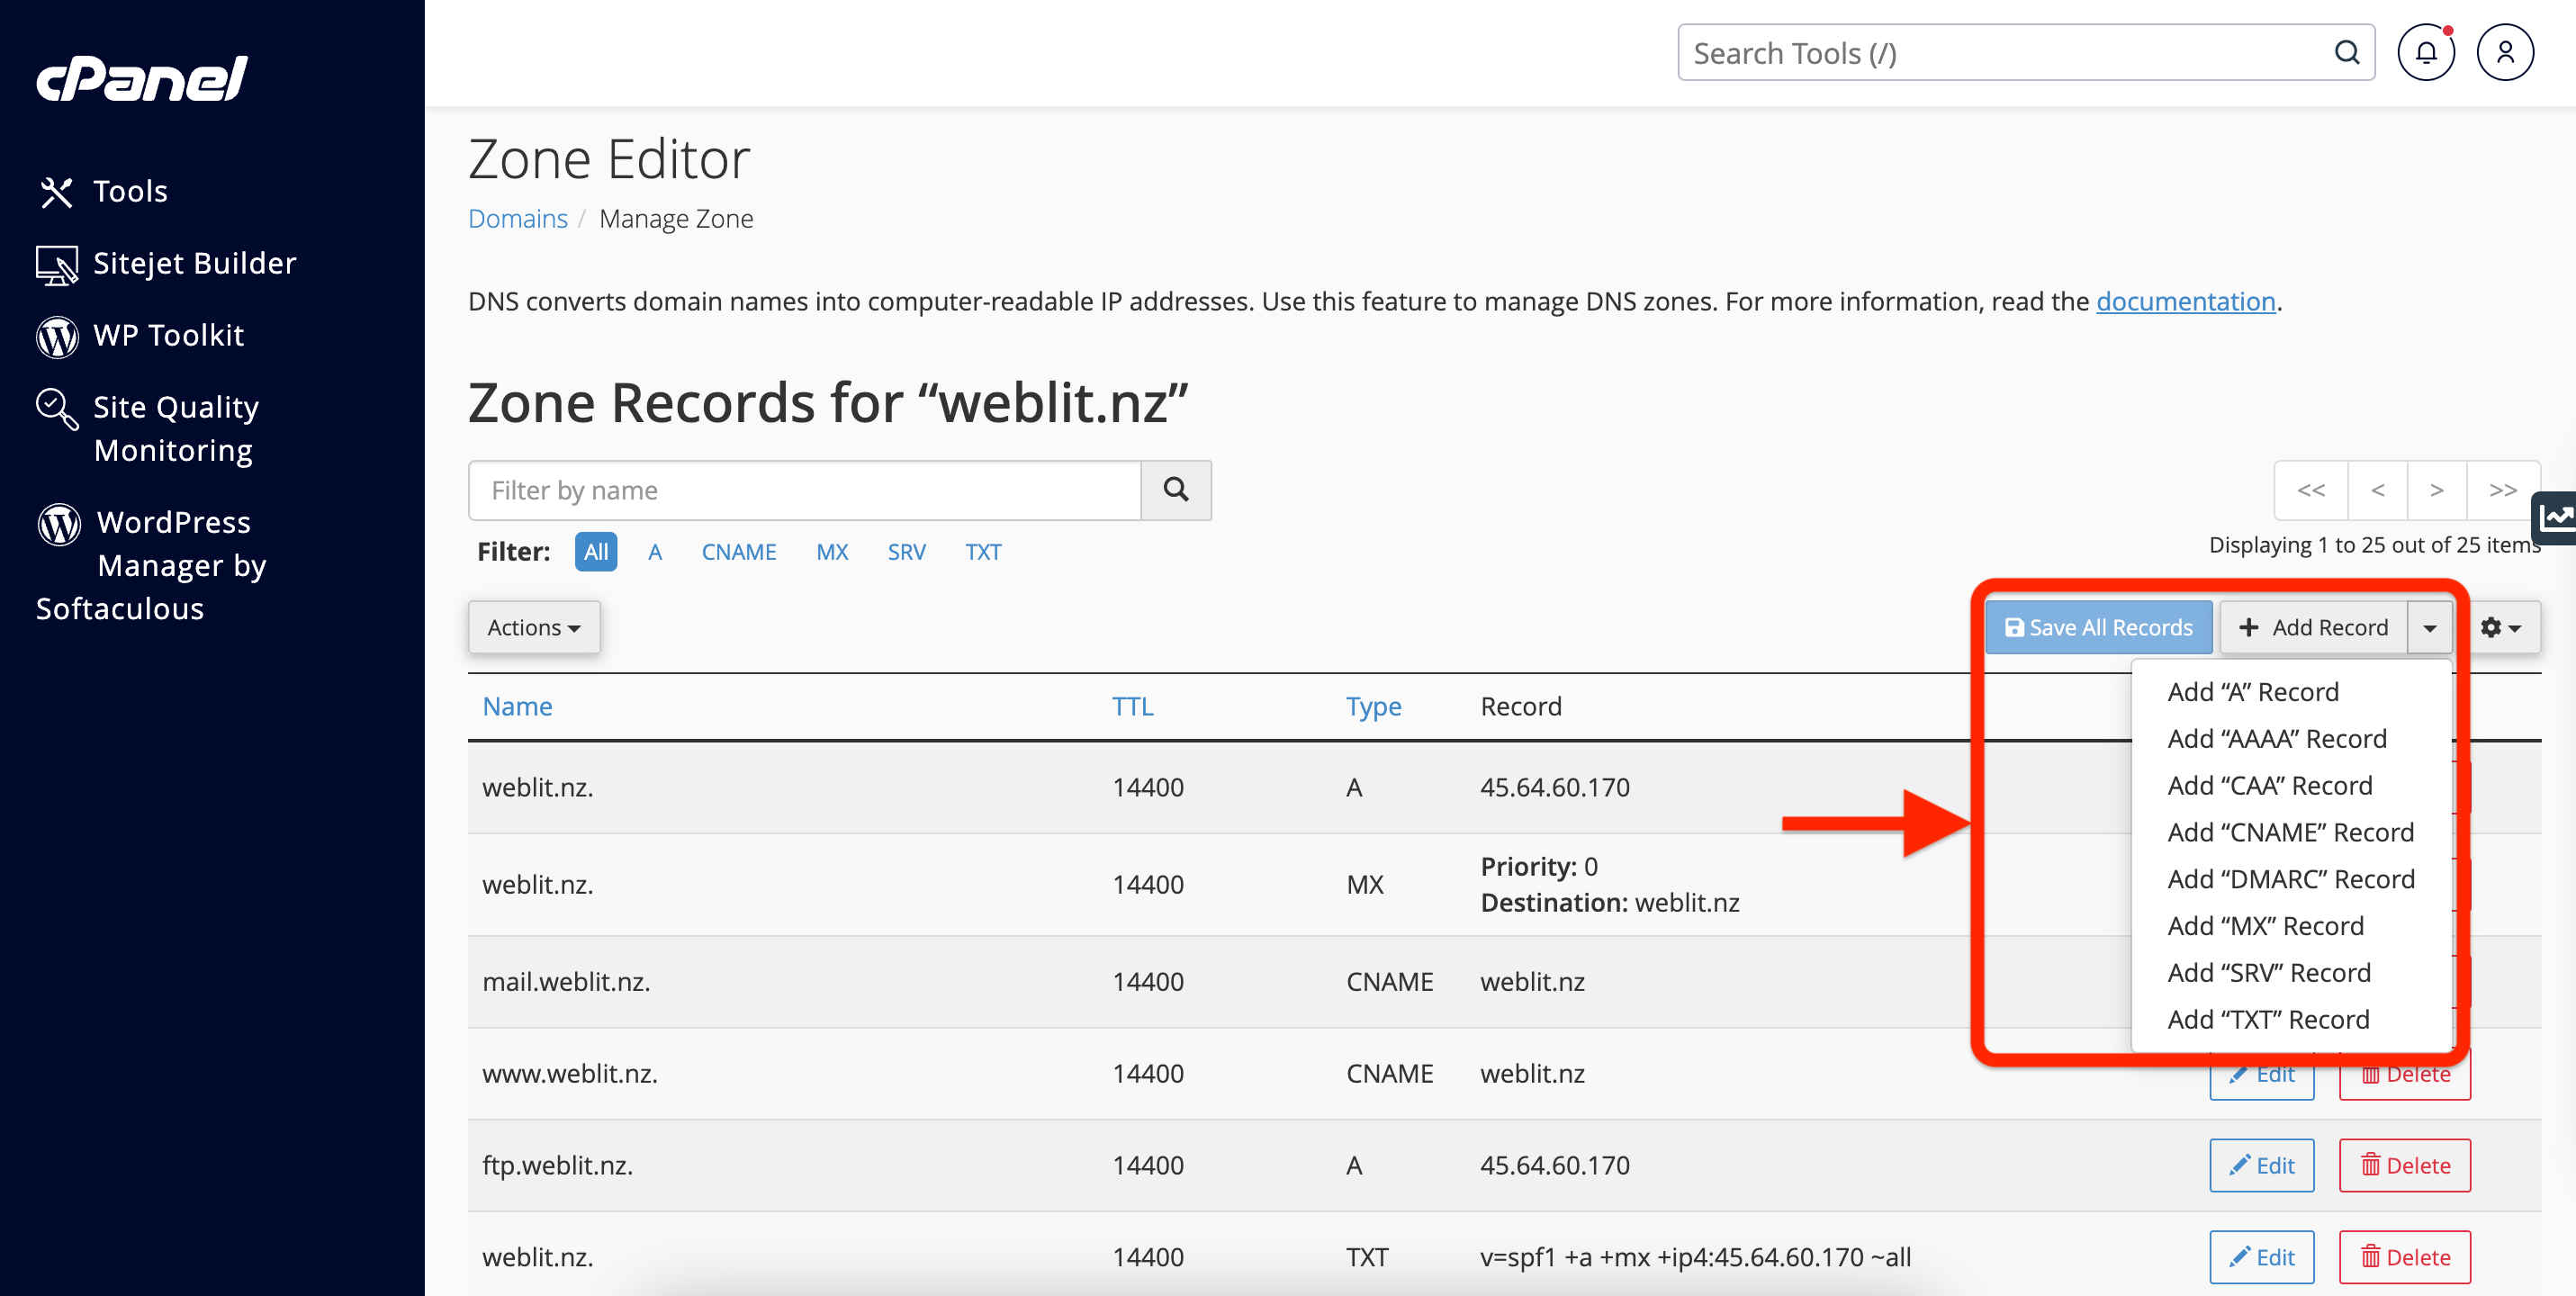
You can now view, add, or modify DNS records. Common DNS records you might want to edit include:
• A Record: Points your domain to an IP address.
• CNAME Record: Alias one domain to another.
• MX Record: Manages email routing for your domain.
• TXT Record: Add custom text or verify your domain.

To add a new record, click Add Record and select the type of record you’d like to create.
5. Editing an Existing Record
To edit an existing record, click Edit next to the record you want to change, make your updates, and save.
6. Save Changes
After adding or modifying your DNS records, click Save All Records to apply the changes.
Conclusion
Modifying DNS records is crucial when setting up or transferring your website or email services. By following the steps outlined in this guide, you can easily manage your domain’s DNS settings from cPanel.
Need Help?
If you encounter any issues modifying the DNS or need further assistance, feel free to email [email protected]. We’re here to help!
Want to see what our customers are saying? Check out our Trustpilot reviews to learn why businesses choose HostMidas for reliable hosting services.
