Learn how to create an email account in cPanel with this easy-to-follow guide. We’ll walk you through each step to help you quickly set up your email accounts for your domain.
Step 1: Log in to cPanel
You can access your cPanel account in two ways:
1. Direct Login: Use your login credentials and go directly to your cPanel by entering this URL in your browser:
https://yourdomain.nz/cpanel
2. Login from the HostMidas Client Area:
• Log into the HostMidas client area.
• Under Active Products, find your hosting plan and click the Login to Control Panel button.

Step 2: Navigate to Email Accounts
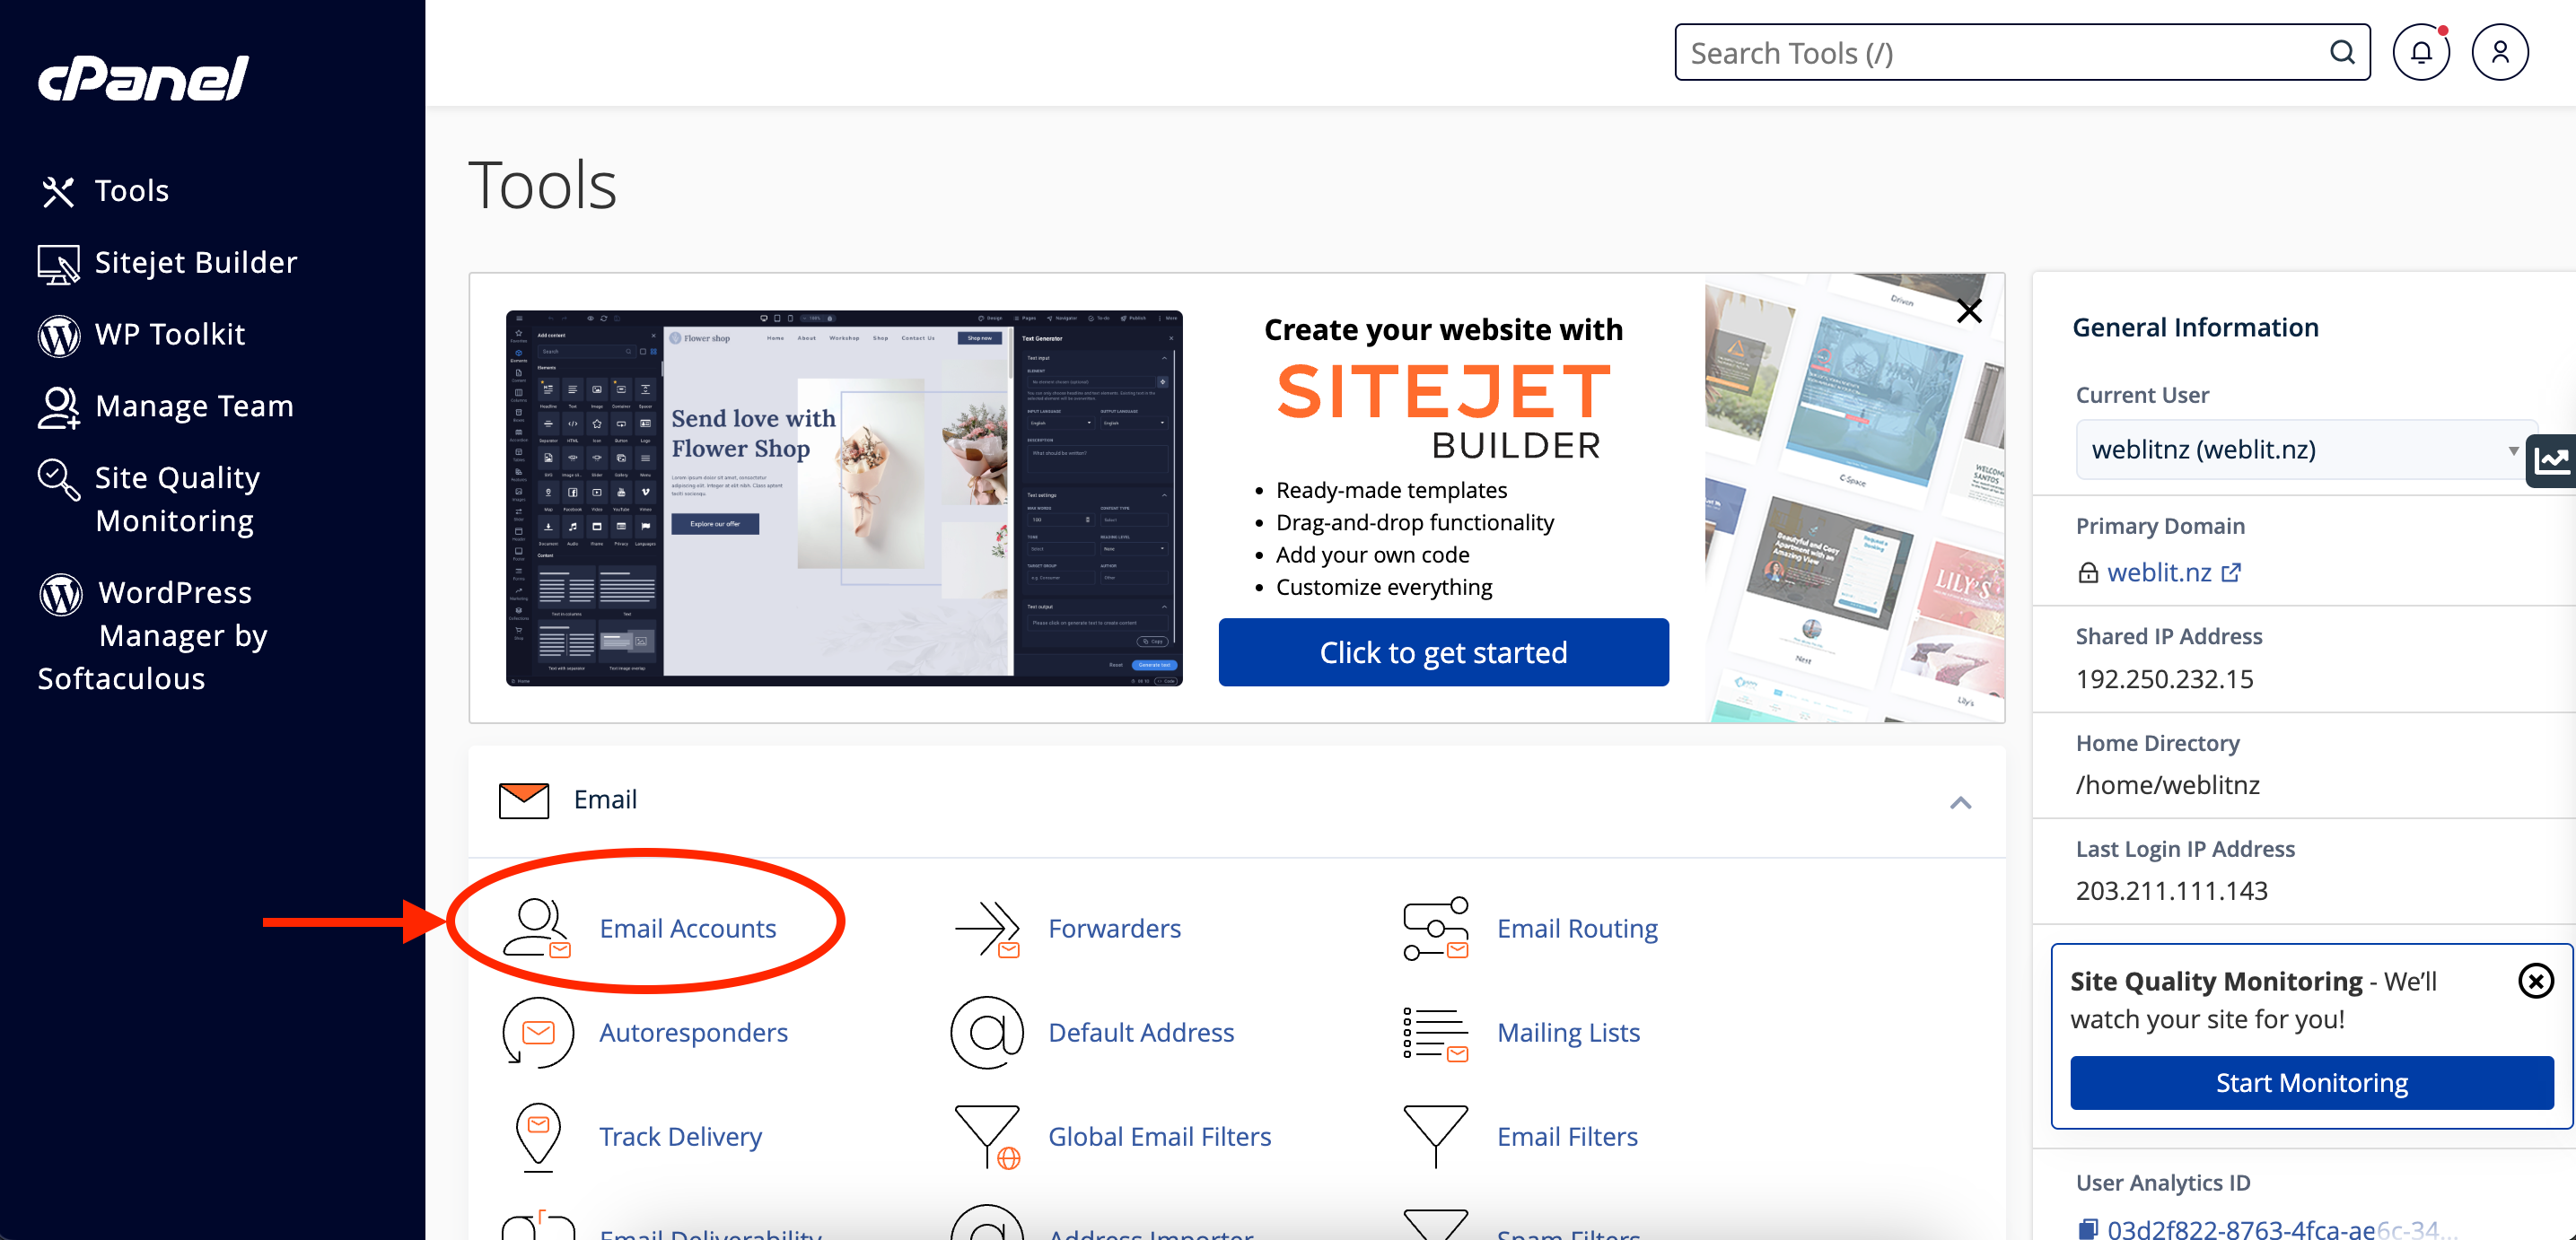
1. Once logged in, scroll down to the Email section.
2. Click on Email Accounts to manage and create new email addresses.

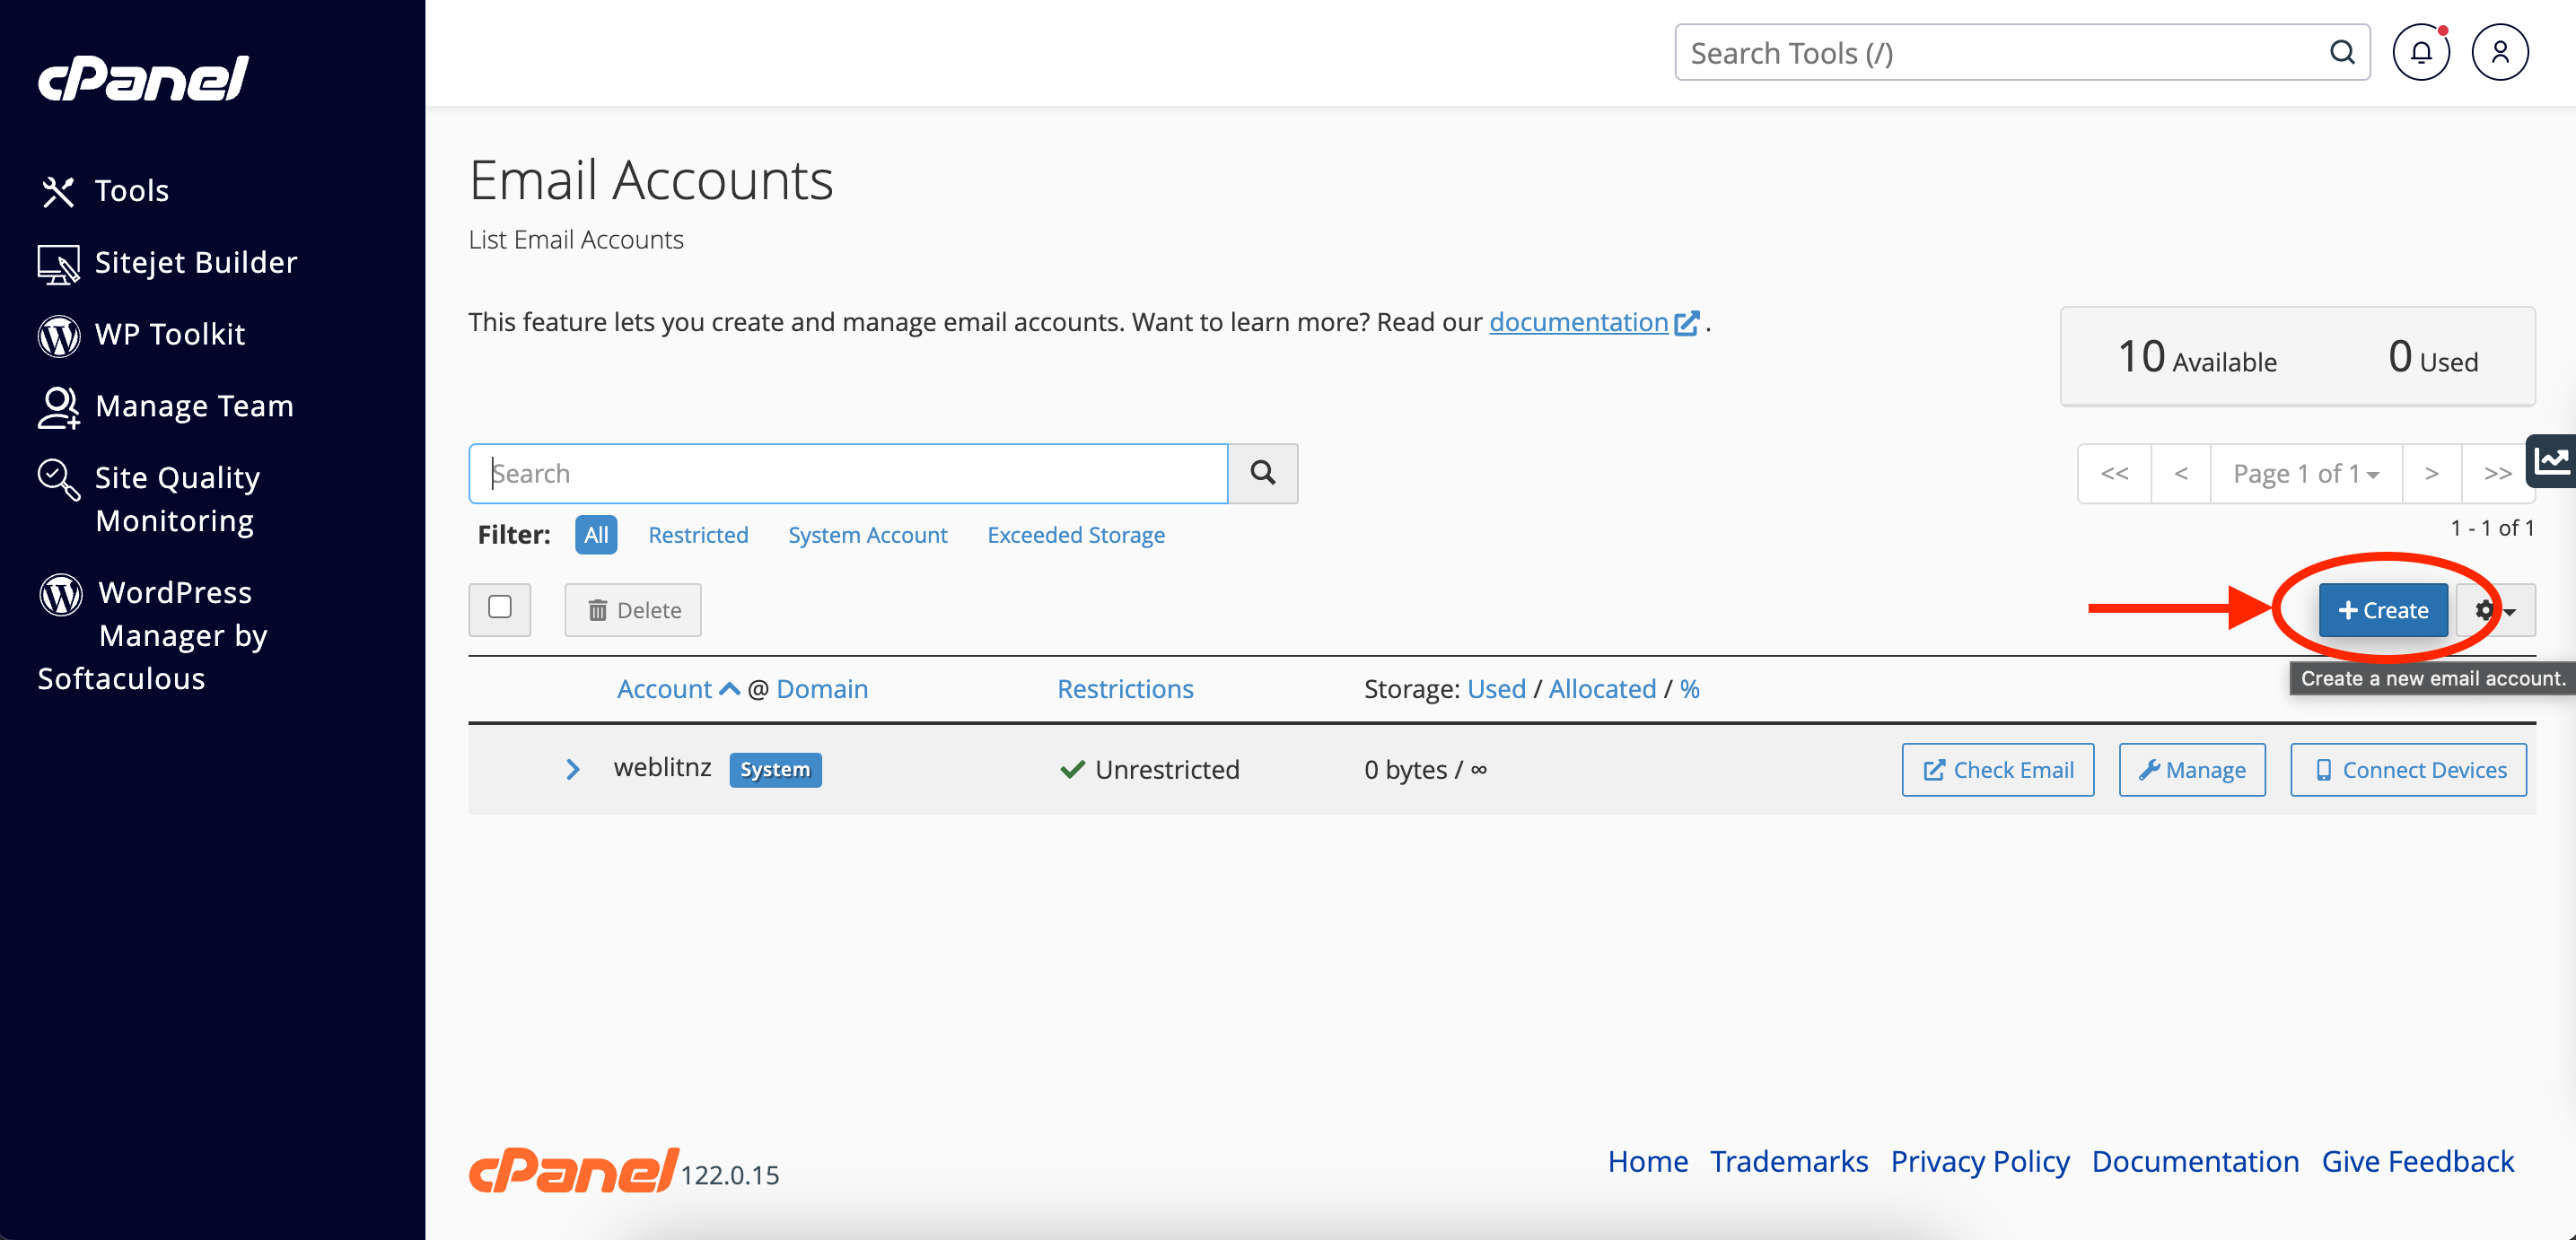
Step 3: Click the “+ Create” Button
On the Email Accounts page, click the + Create button on the right-hand side to start creating a new email address.

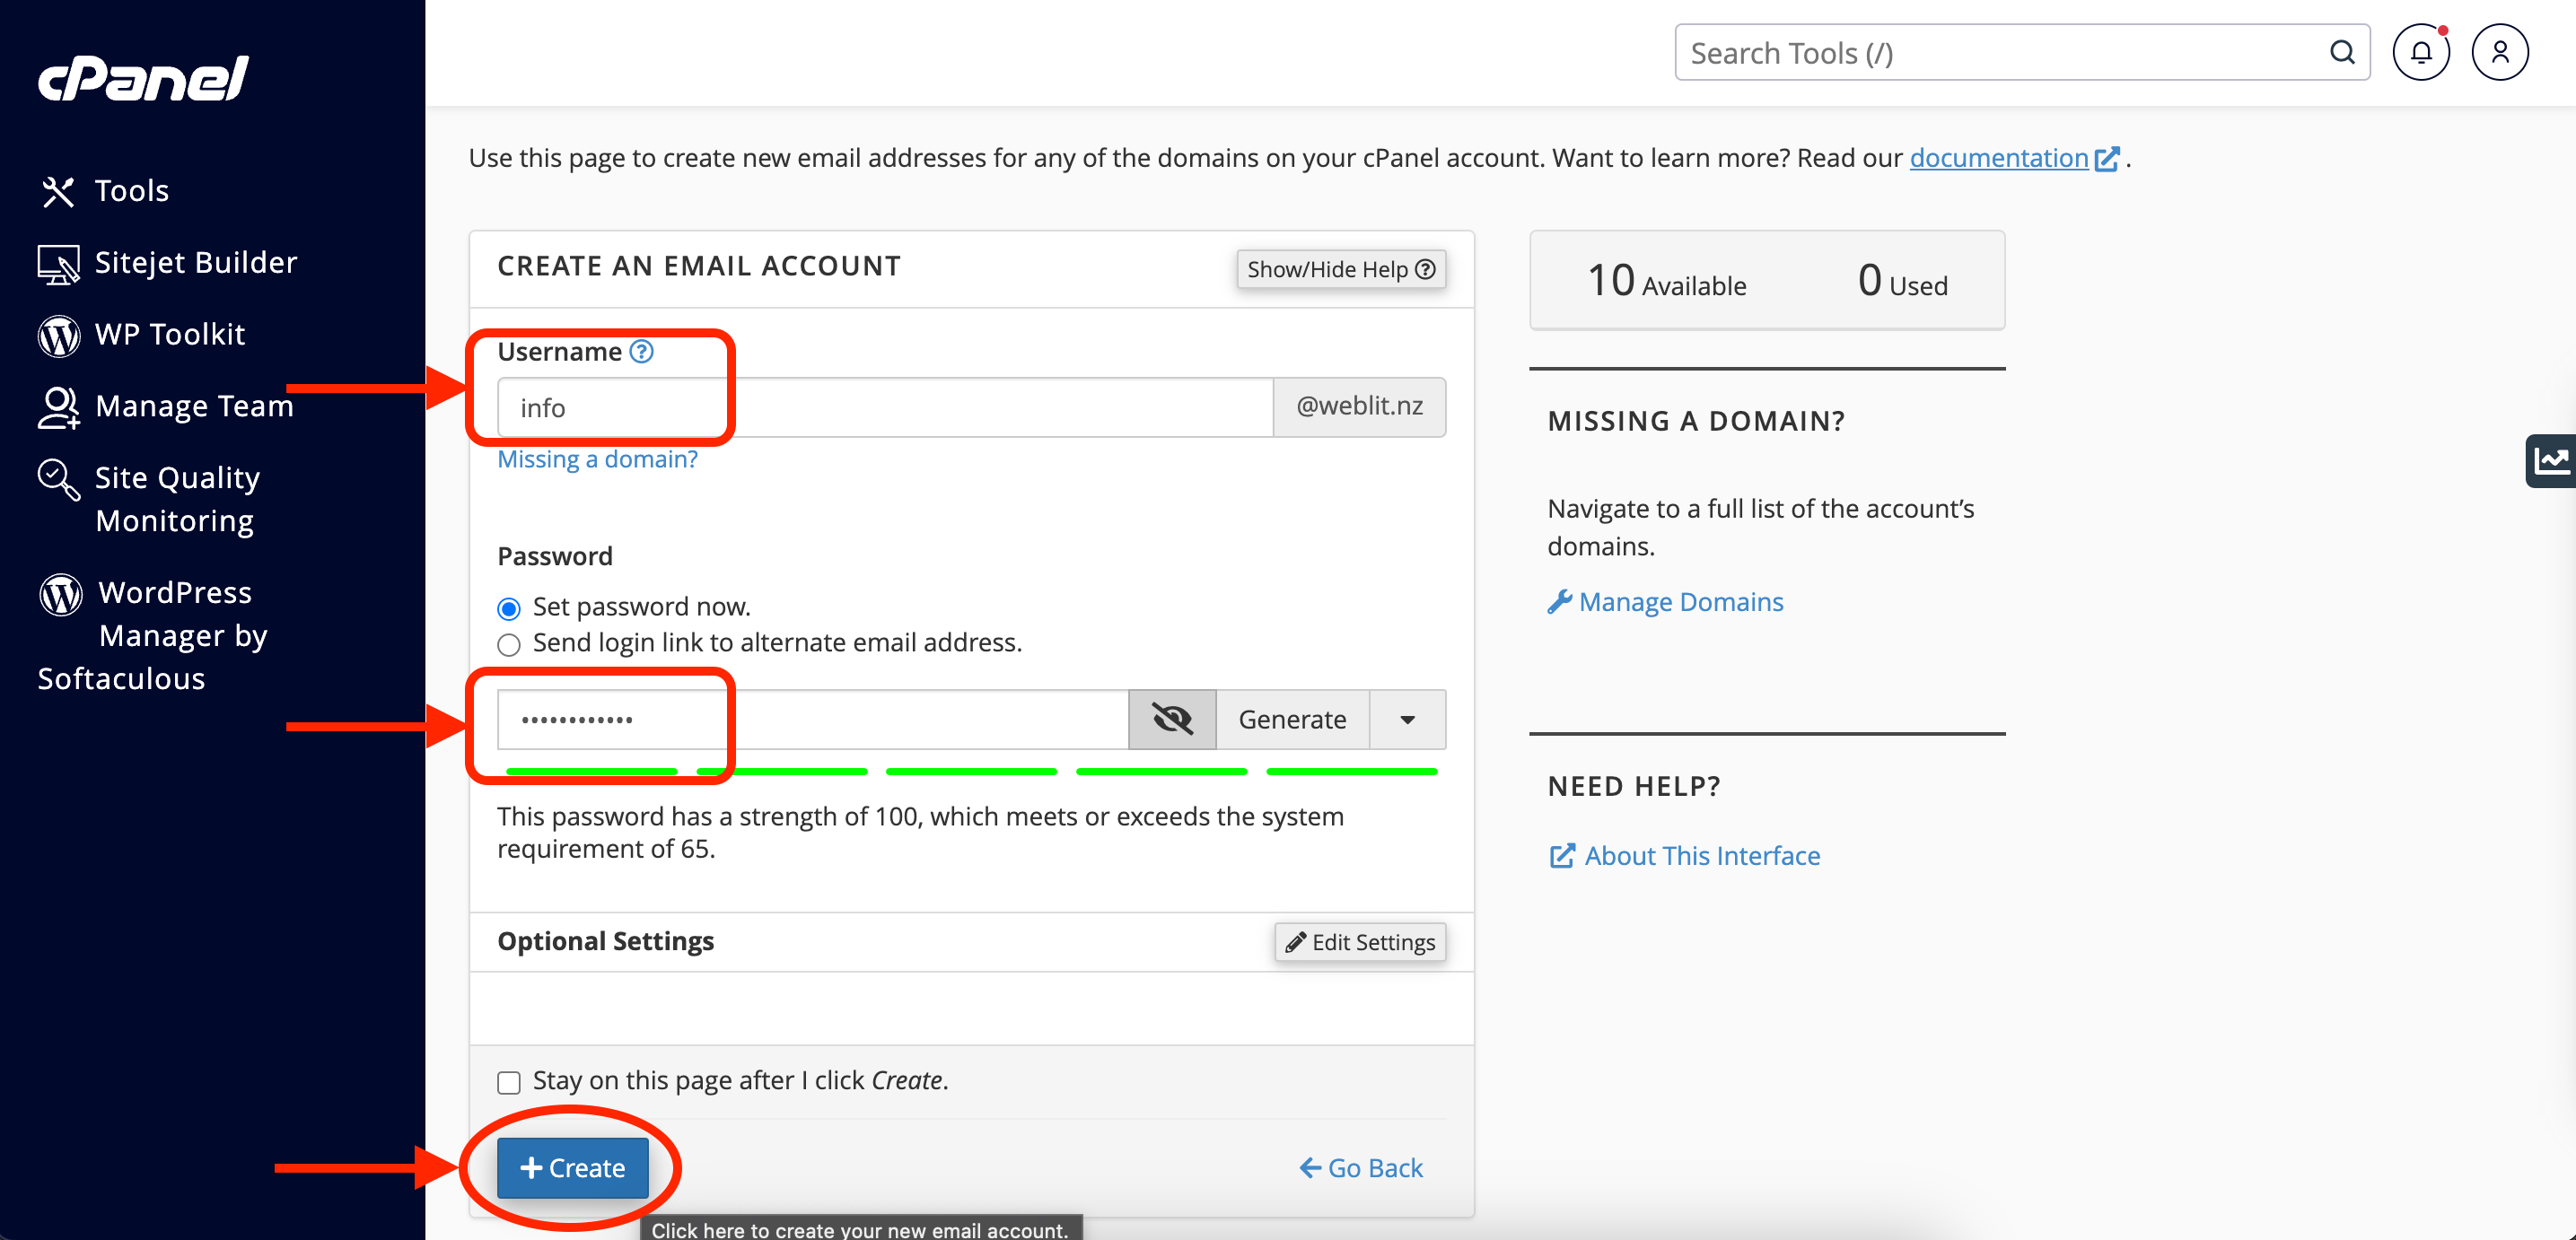
Step 4: Enter Email Account Information
1. Username: Enter the desired username for your email (e.g., info, support). The full email address will look like [email protected].
2. Password: Choose a secure password, or click Generate to create a strong password. Ensure the password meets the system’s strength requirements.
3. Optionally, you can configure other settings like storage quotas, but the default settings usually work for most users.

Step 5: Complete the Setup
Once you’ve filled in the necessary details, click + Create at the bottom of the form to create the email account.
Step 6: Manage Your New Email Account
Your new email account will now be listed under the Email Accounts section, where you can manage it, check email, and connect devices.
Need Help?
If you encounter any issues while creating an email account in cPanel or need further assistance, feel free to contact HostMidas Support. We’re here to help!
Want to see what our customers are saying? Check out our Trustpilot reviews to learn why businesses choose HostMidas for reliable hosting services.
